
Rust-Oleum Home Floor Coating for Painting Tile Floors
June 12, 2020
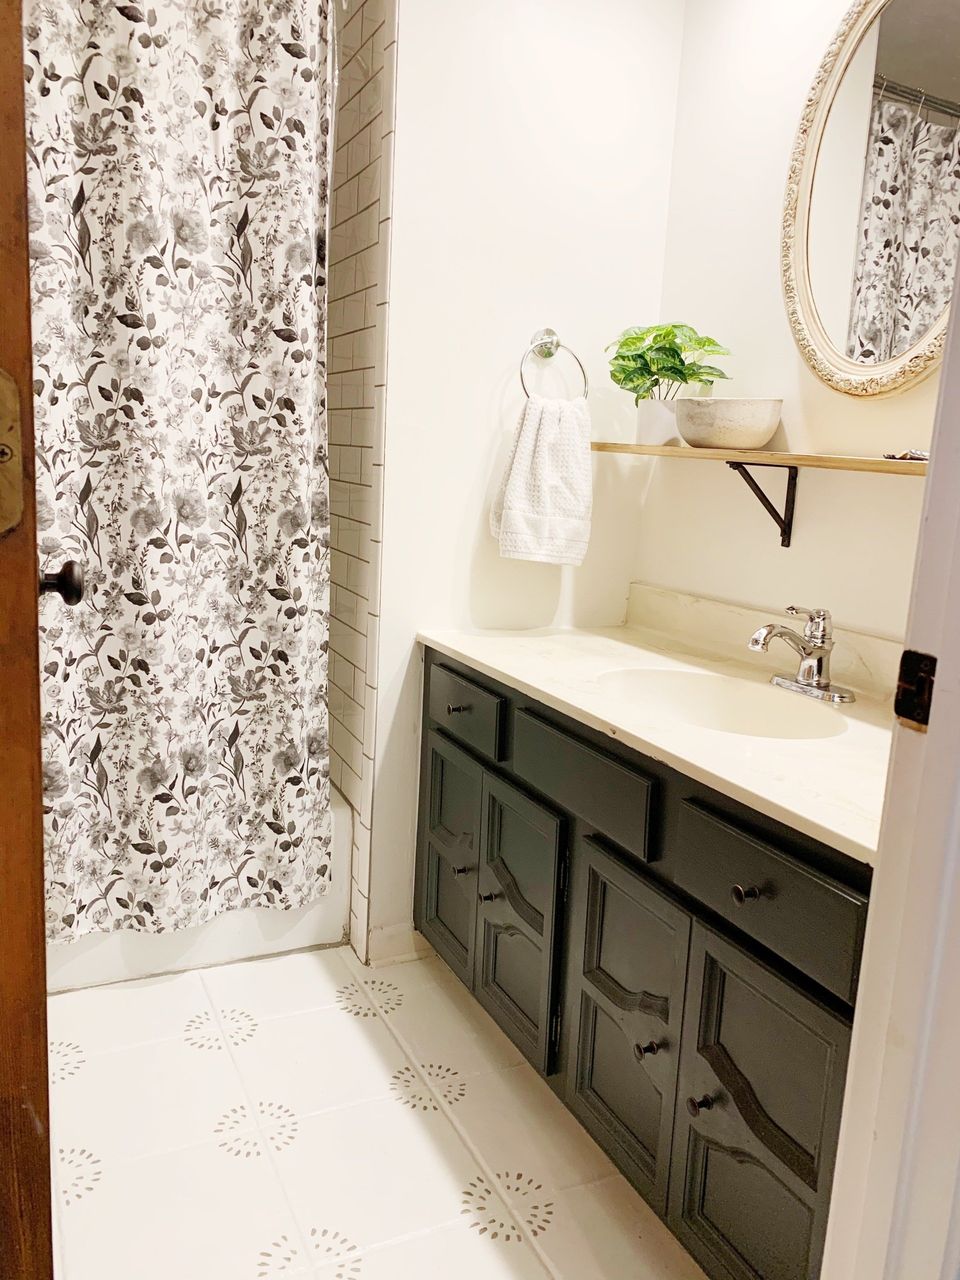
There IS a Right AND a Wrong Way to Paint Tile Floors
Let's start with this--there is definitely a right and wrong way to paint tile. I have done both. The funny thing is that the RIGHT way is actually easier than the wrong way. If you want to read about my experience doing the WRONG way, read about my experience using chalk paint and while you're at it, check out my rad pattern, because you can still use that technique using the right materials! Oh, and now I have experience laying luxury vinyl planks, so not all is lost. I am all about learning and fun new experiences.
Prepping the Floor
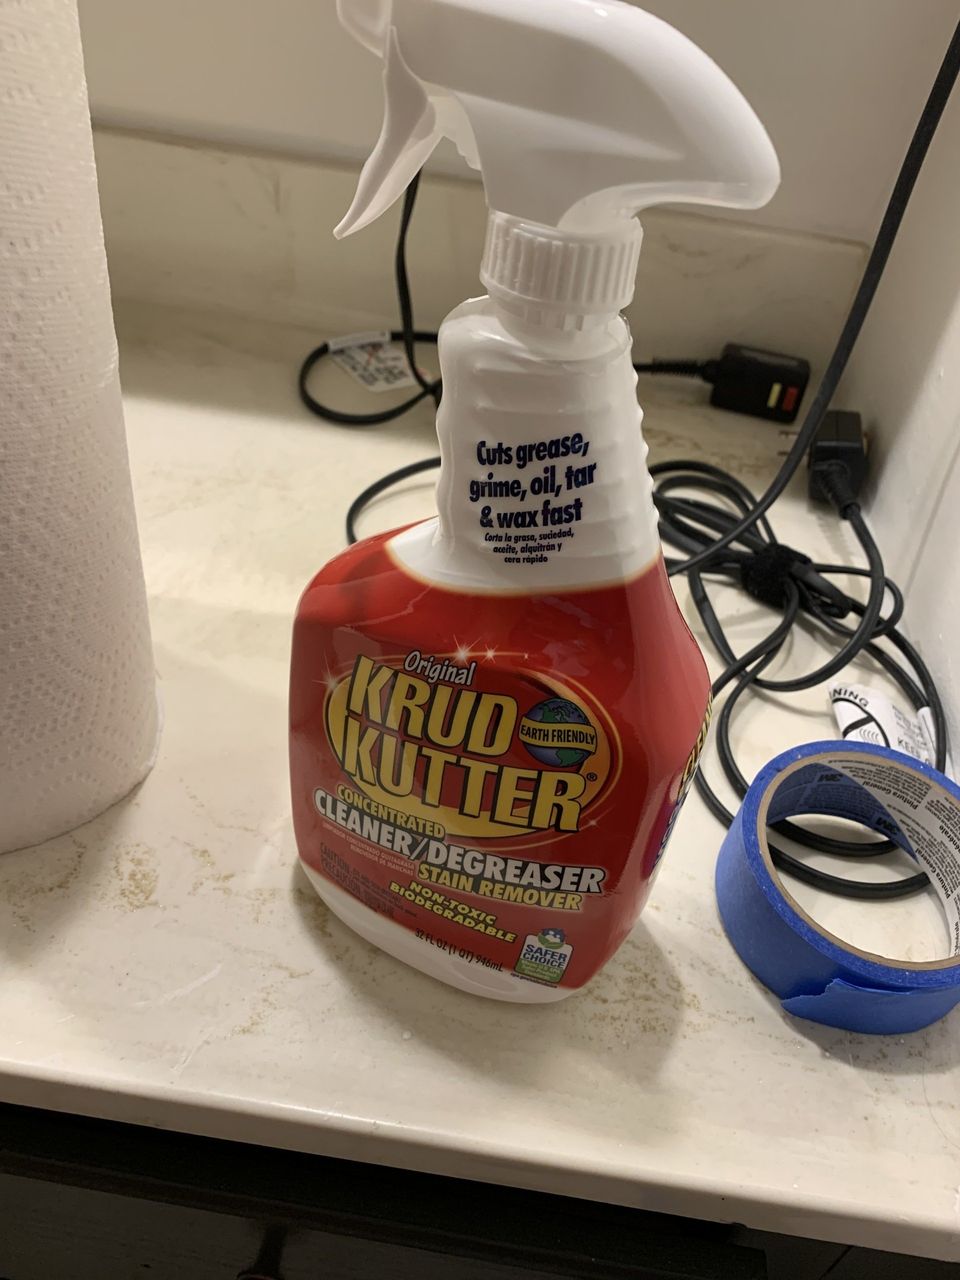
I used Krud Kutter to clean and degrease the floor. It prepares the surface for painting. You can immediately tell the tile is a different texture. Another important thing to have on hand is a hairdryer to blow off any dirt or hair, because, inevitably, it keeps finding it's way into the room. Also, wear clean socks while working. It helps if you don't wear them anywhere else so they don't bring in any dirt or dust. Oh, and tape off your baseboards, bathtub, toilet, etc. I like Frog Tape.
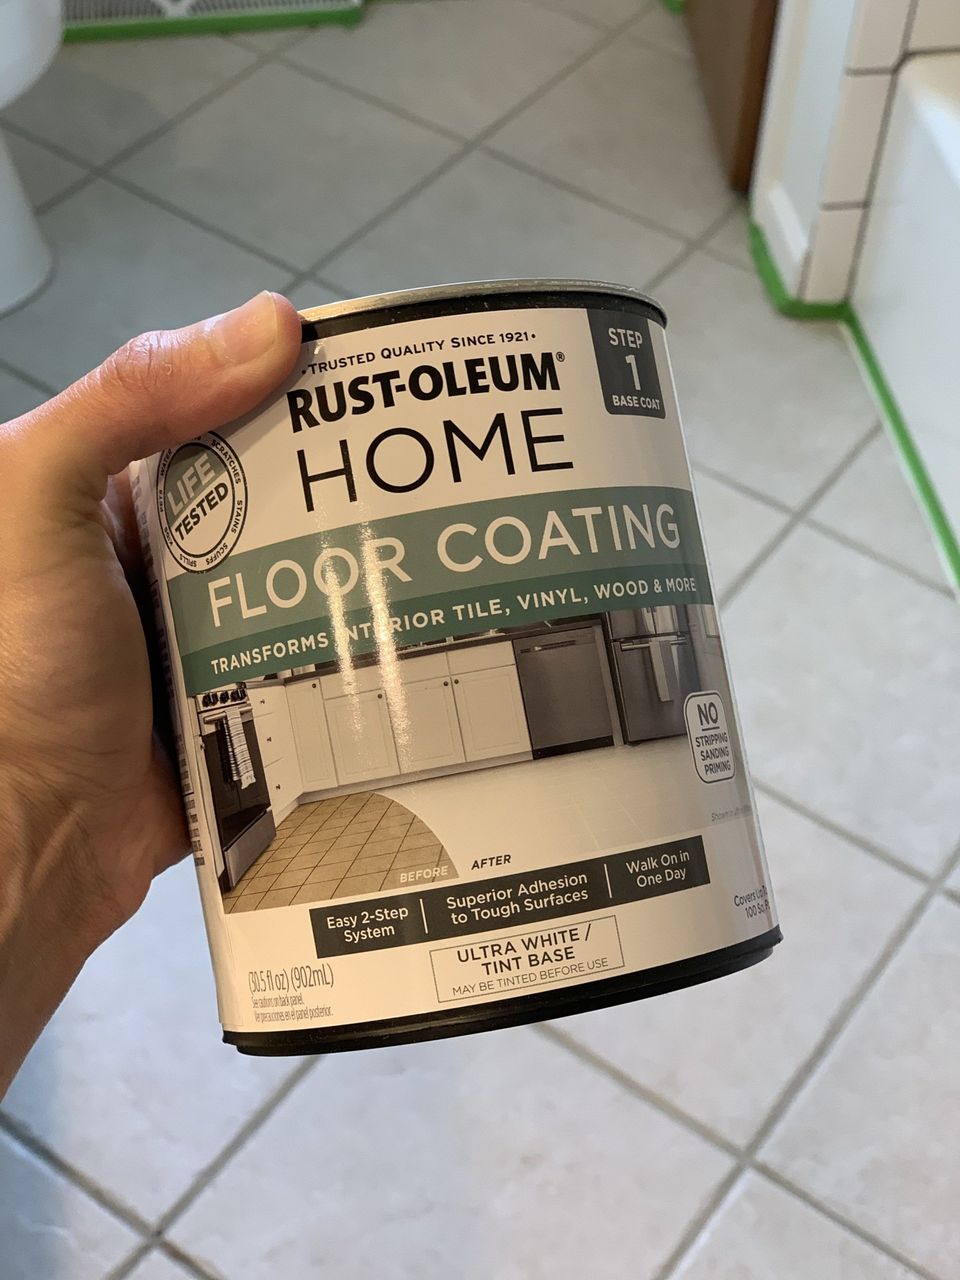
Rust-Oleum Home Floor Coating
Rust-Oleum Home Floor Coating
is specifically made for painting tile floors. It is a two-step system that includes a base coat and sealer and can be completed in 1-2 days. It even has a "no peel" guarantee, which is awesome, since peeling was the problem with the chalk paint/poly combo. I've seen numerous bloggers/Instagrammers use this product over and over, so I was anxious to try it.
I purchased a kit
that included a quart each of base coat and sealer, along with a floor prep solution for $39.99. You can also purchase it by the gallon, or individual quart. I didn't use the floor prep because I had already used Krud Kutter when I discovered it in the box. I knew from watching tutorials that Krud Kutter would be fine to use. I also noticed all the warnings on the bottle which scared me.
I chose to use Ultra White, but you can have the can of paint tinted at the paint counter in a dozen or more colors.
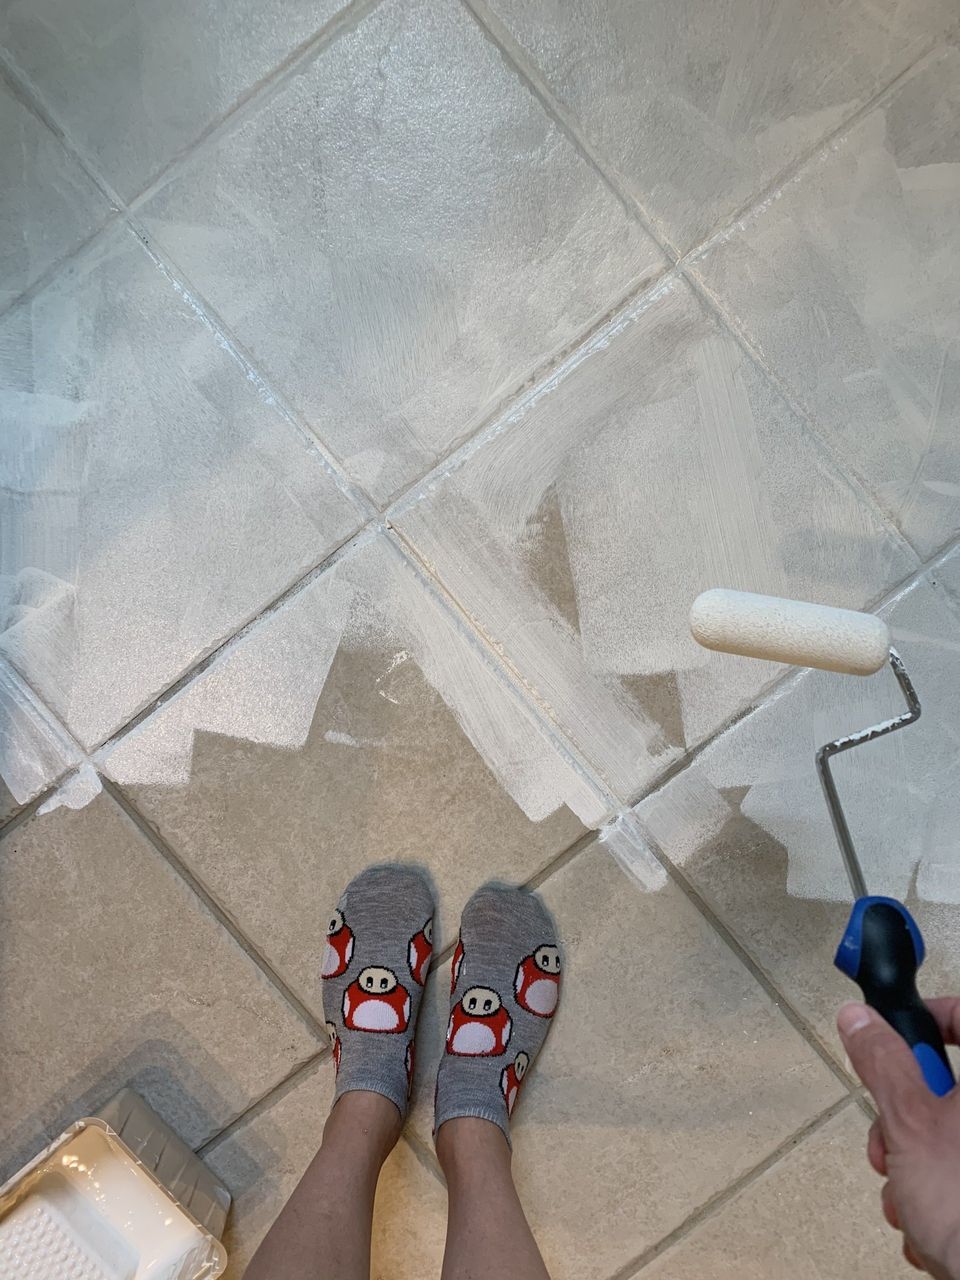
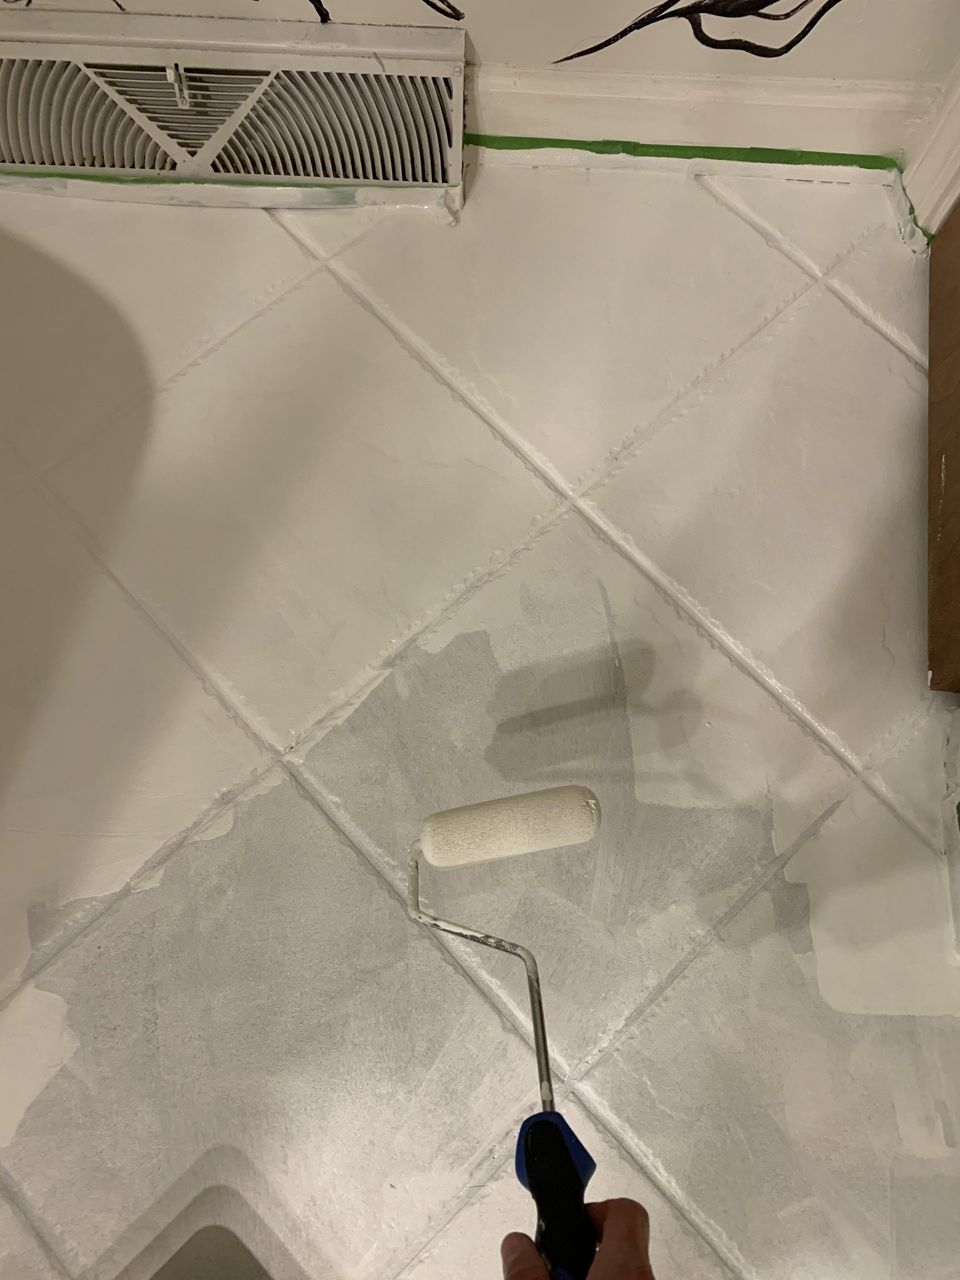
There are instructions on the cans, but I'll tell you what I did. I rolled on my first coat of white with a small foam roller. I did use a small artist's brush to get behind the toilet and in the grout along the baseboards in a few places. I let this dry for 6 hours.
Part 2
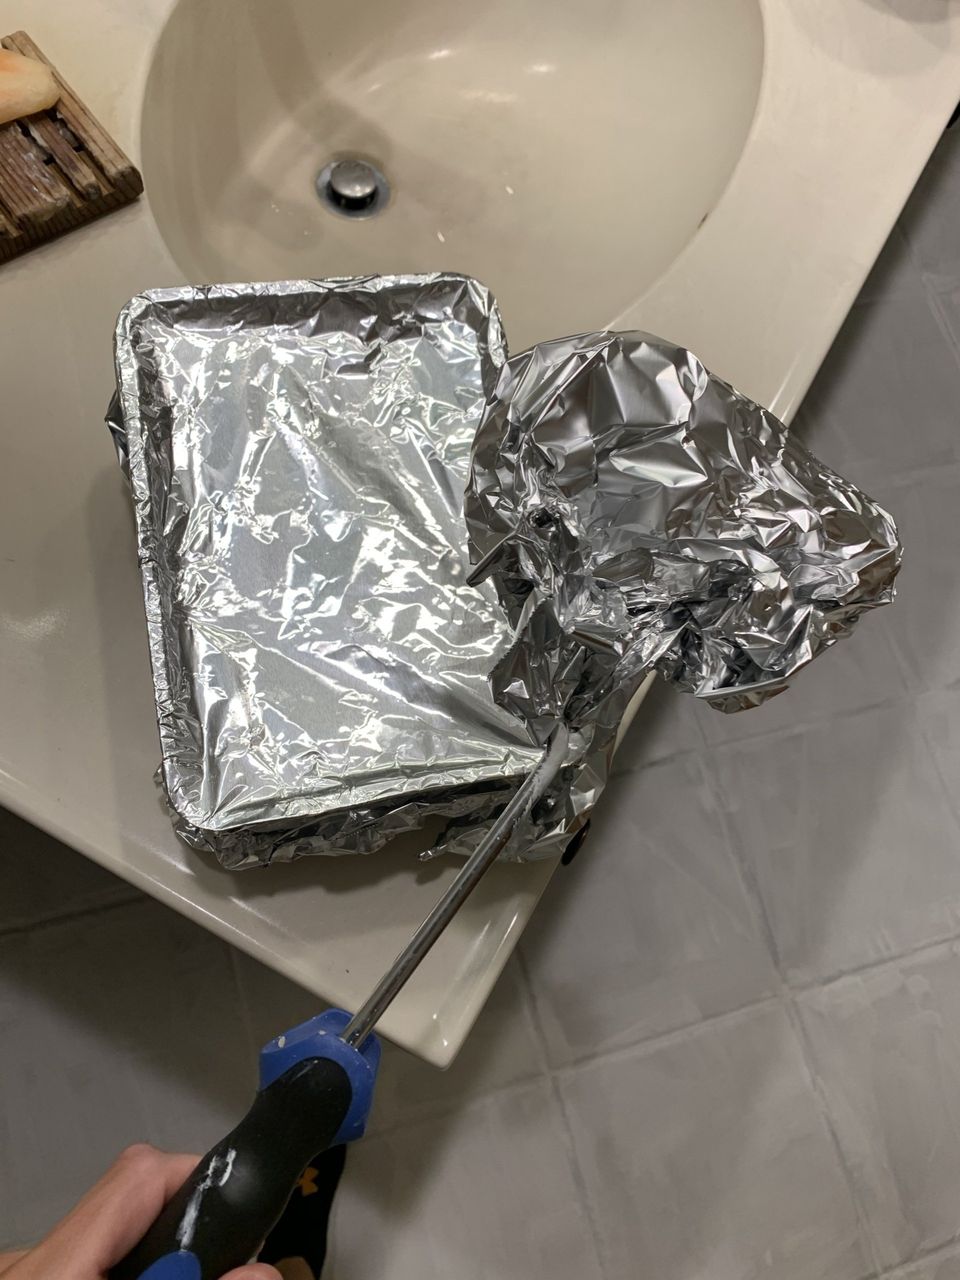
After 6 hours, I put my clean socks back on and went back for another coat. It says Ultra White takes 2 coats and the other tinted colors only take one. You can see I definitely needed another coat. It's still a little tacky when you're putting on the second coat. This needs to dry for another 6 hours, but I let mine dry overnight, since I was doing this at 10 pm. I learned from @AngelaRoseHome
to wrap my paint roller in aluminum foil so it stays nice and fresh between paint jobs--genius!
Making your pattern
I wanted a pattern on this floor, but knew a stencil wouldn't work, because these tiles are textured and the paint would bleed under the stencil. There are about a million at Cutting Edge Stencils
I would love to use, though! I had also tried (unsuccessfully) a sample of a removable tile decal, but it just doesn't work because of the textured edges. That would be a great option if you have smooth tiles--they can be custom-made to size. Hexagon Decor and BleUcoin on Etsy both have awesome designs.
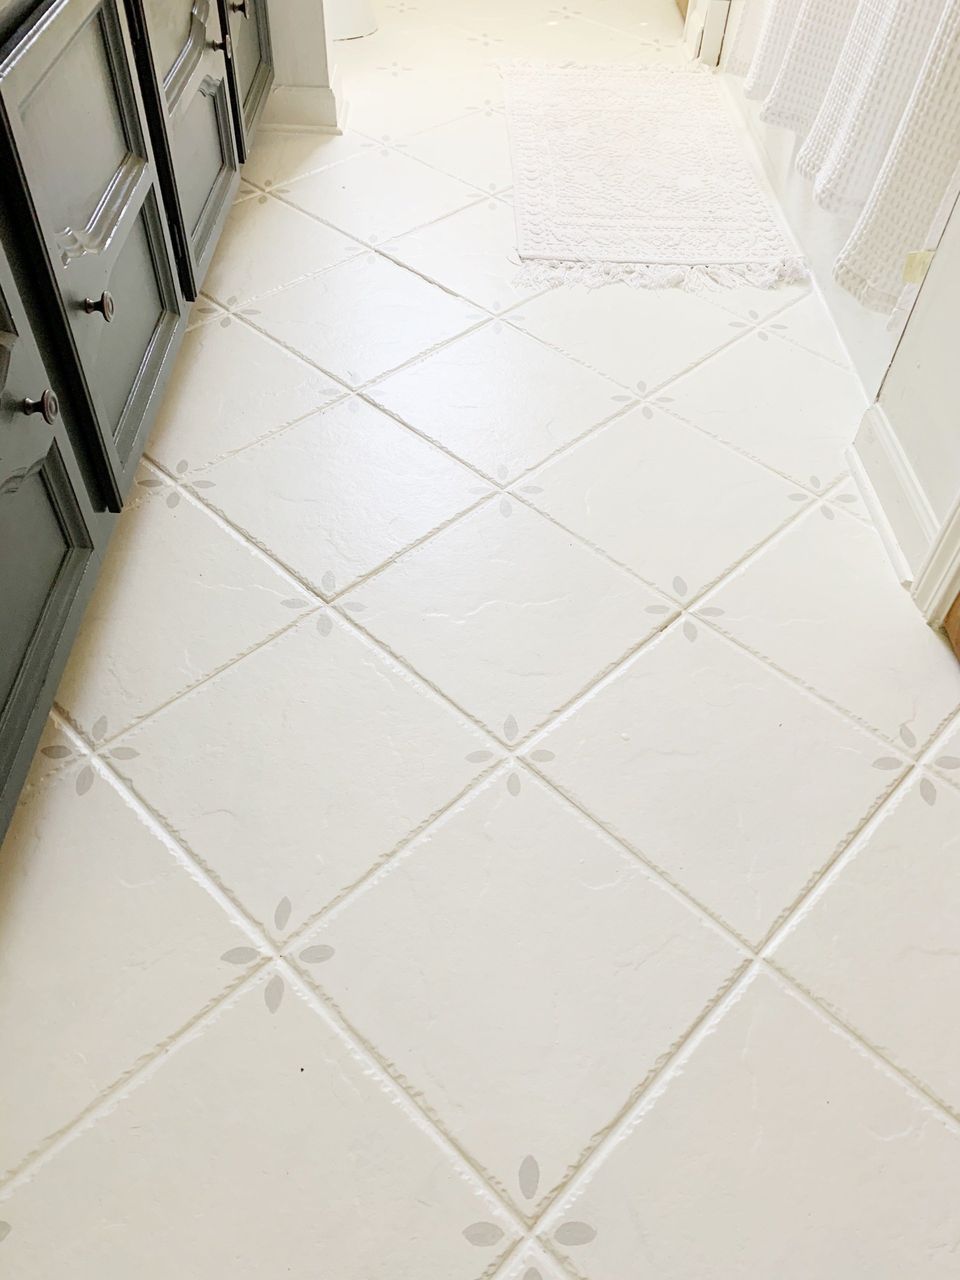
I chose to do something in simple in our other bathroom, so I found a drink lid to make the pattern. I thought about using that same pattern in here, but decided it was too busy.
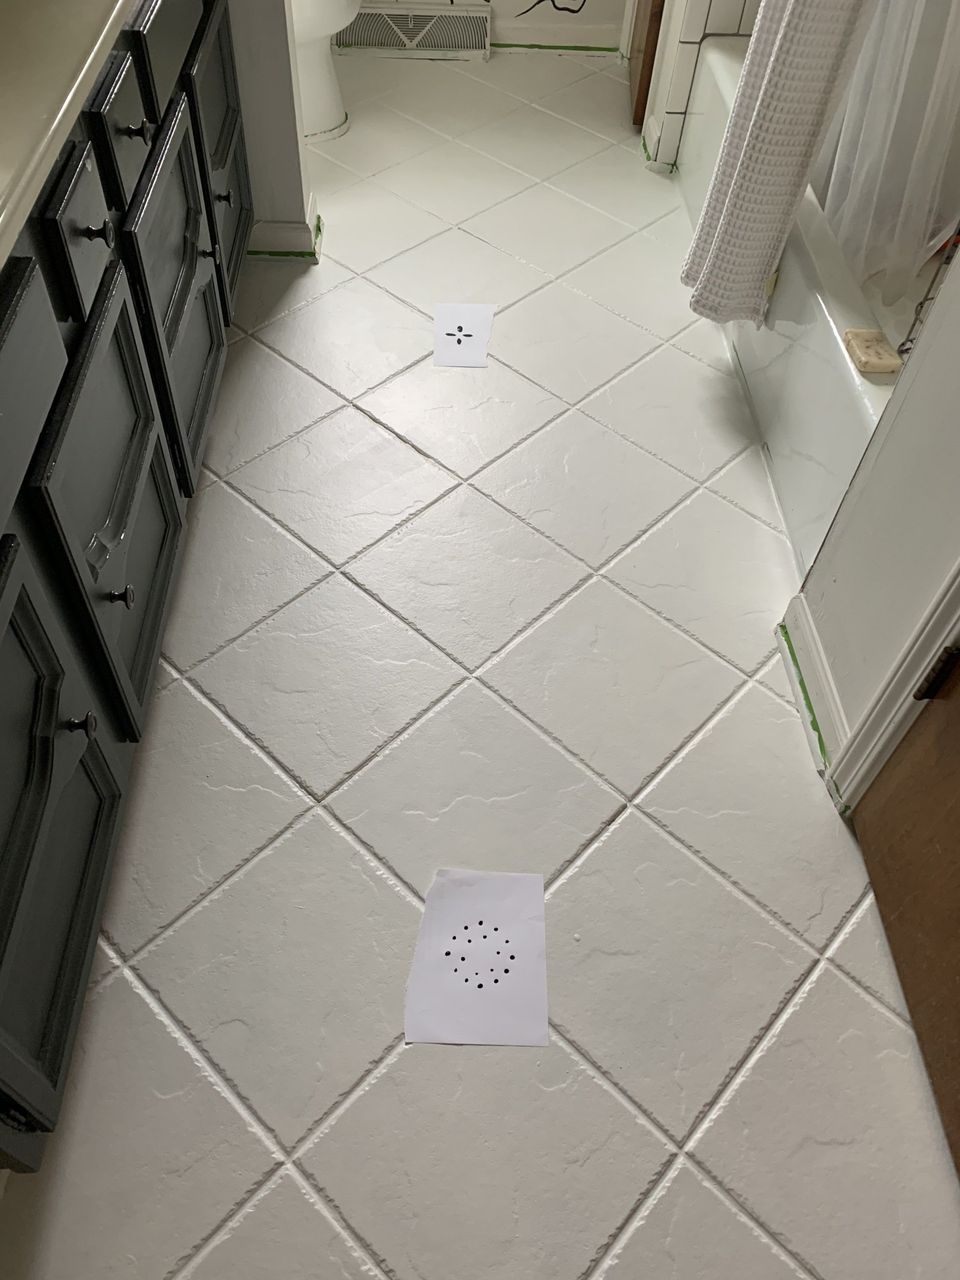
I was thisclose to keeping it solid white, but I painted a couple test designs in different colors on white paper and laid them down on the tile to decide. I wanted something simple that didn't compete with the wall too much, and distracted from the diagonal tile.
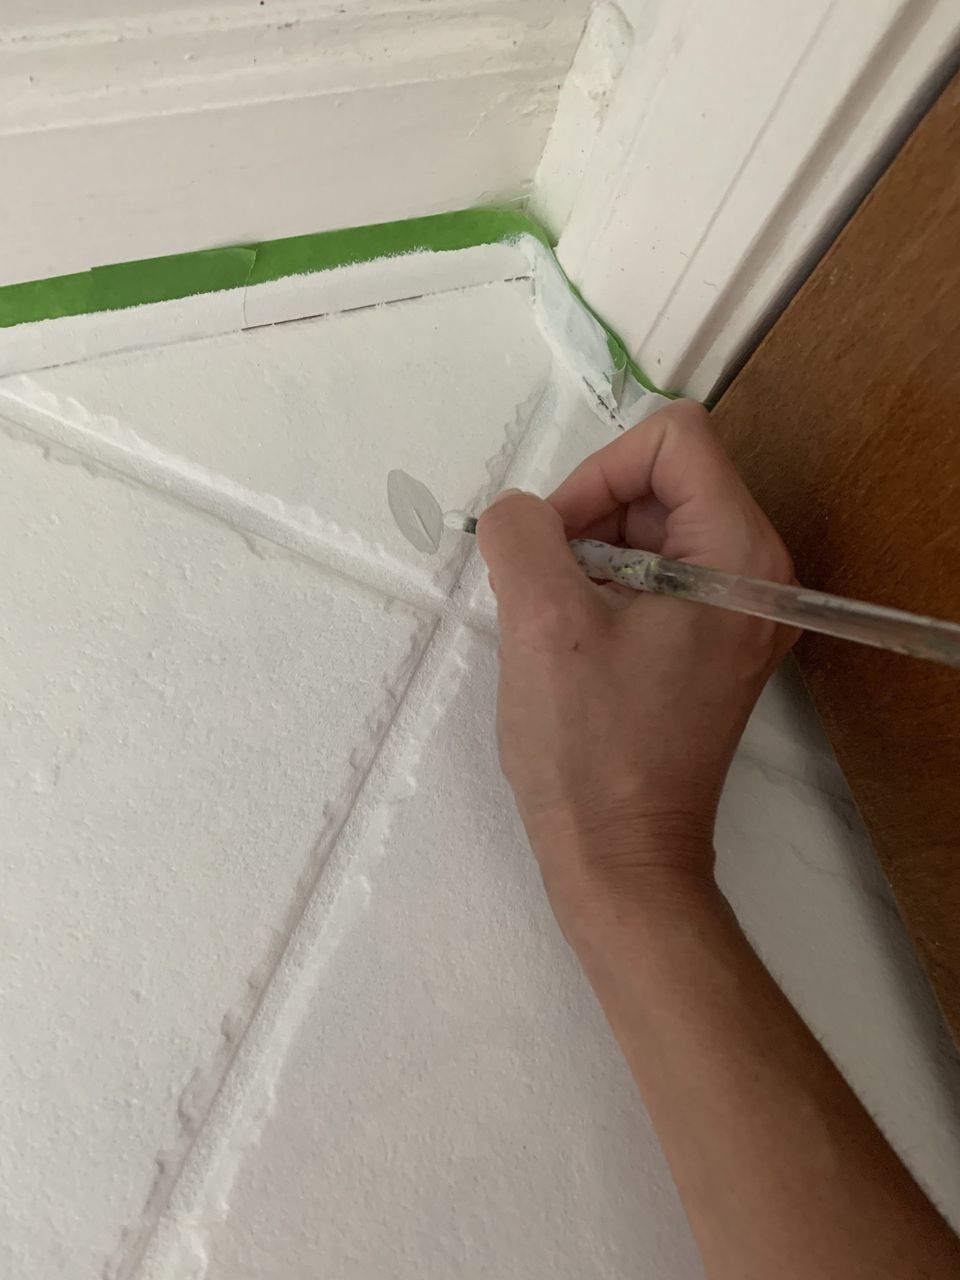
I chose to do a light grey pattern on each grout intersection, and since it was a VERY small amount of paint, I used chalk paint. I would definitely recommend using the Rust-Oleum product in a different color if you were having the design cover much of the floor. I am not concerned with this small amount of paint's durability.
Sealing
Once the paint was all dry, I rolled on one coat of the sealer and let it dry for a day. It is ready for foot traffic in 24 hours, and you can move furniture back in after 72 hours, but it isn't fully cured for 7 days. This was really easy. It's super thin and watery, so you don't use hardly any of it.
Finishing Everything Up
I didn't have much trouble with any part of this project. There were a couple small places where I didn't have the tape smooth that need to be touched up, but overall, this was very easy. I also used a straight edge/razor blade to help release the tape along the baseboards, since I had trouble with this with my other bathroom. I also took this opportunity to paint and caulk my baseboards, so everything looks super clean and fresh in here. Caulking really helps finish off the tile and I highly recommend it.

The CORRECT way to paint your tile floors
The Rust-Oleum product was a real win here. It really works and provides a beautiful result with the durability that matters. It is easier than trying to do this with something like chalk paint. I highly recommend it and painting all your old outdated tile. I think this would work wonders on an ugly back splash. You are really only limited by your imagination.
Pin for Later!


Rifle Paper Co Wallpaper

Space Planning

Rifle Paper Co Wallpaper

Designer Drapes

Rug Roundup January 2024

Booth at Christmas Market
Grasscloth

What not to do

Romabio Velatura Mineralwash

I can't remember the first example of fluted wood furniture I saw, but it was probably either this gorgeous custom wood bathroom vanity from Chris Loves Julia , or the DIY fluted coffee table Fariha shared on Pennies for a Fortune . The custom cabinetry was done professionally using a router for each line, which isn't something I possess the skills to do. This did help inspire the colors I used in our bathroom remodel, though! I really connected to the method Fariha used to build the coffee table--wooden dowels. What a fabulous idea!