
Jenny Lind Dresser Makeover
May 11, 2020
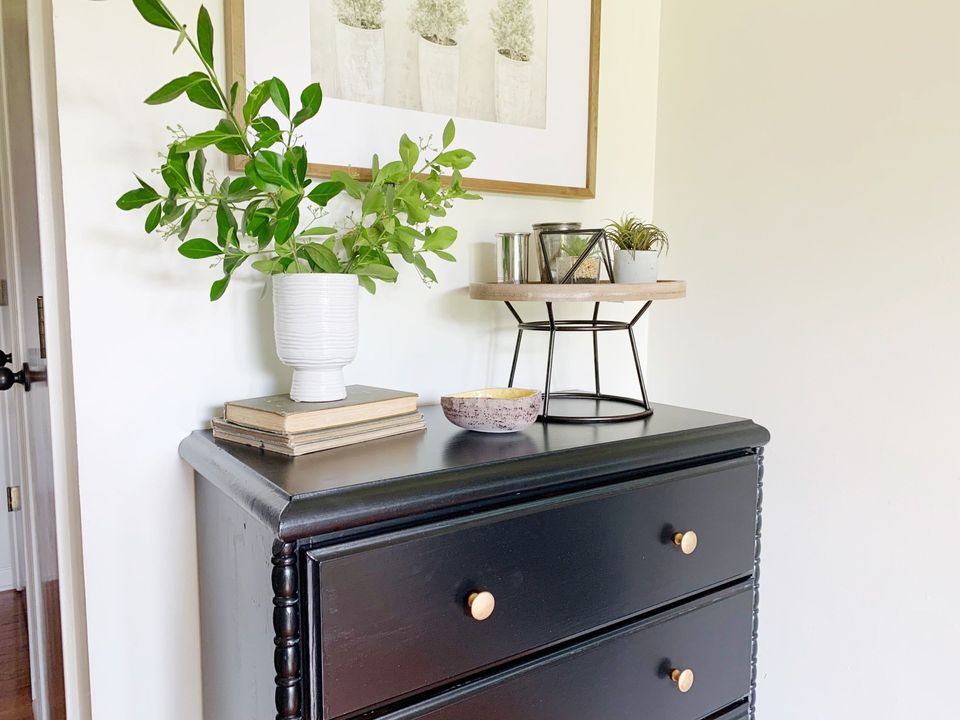
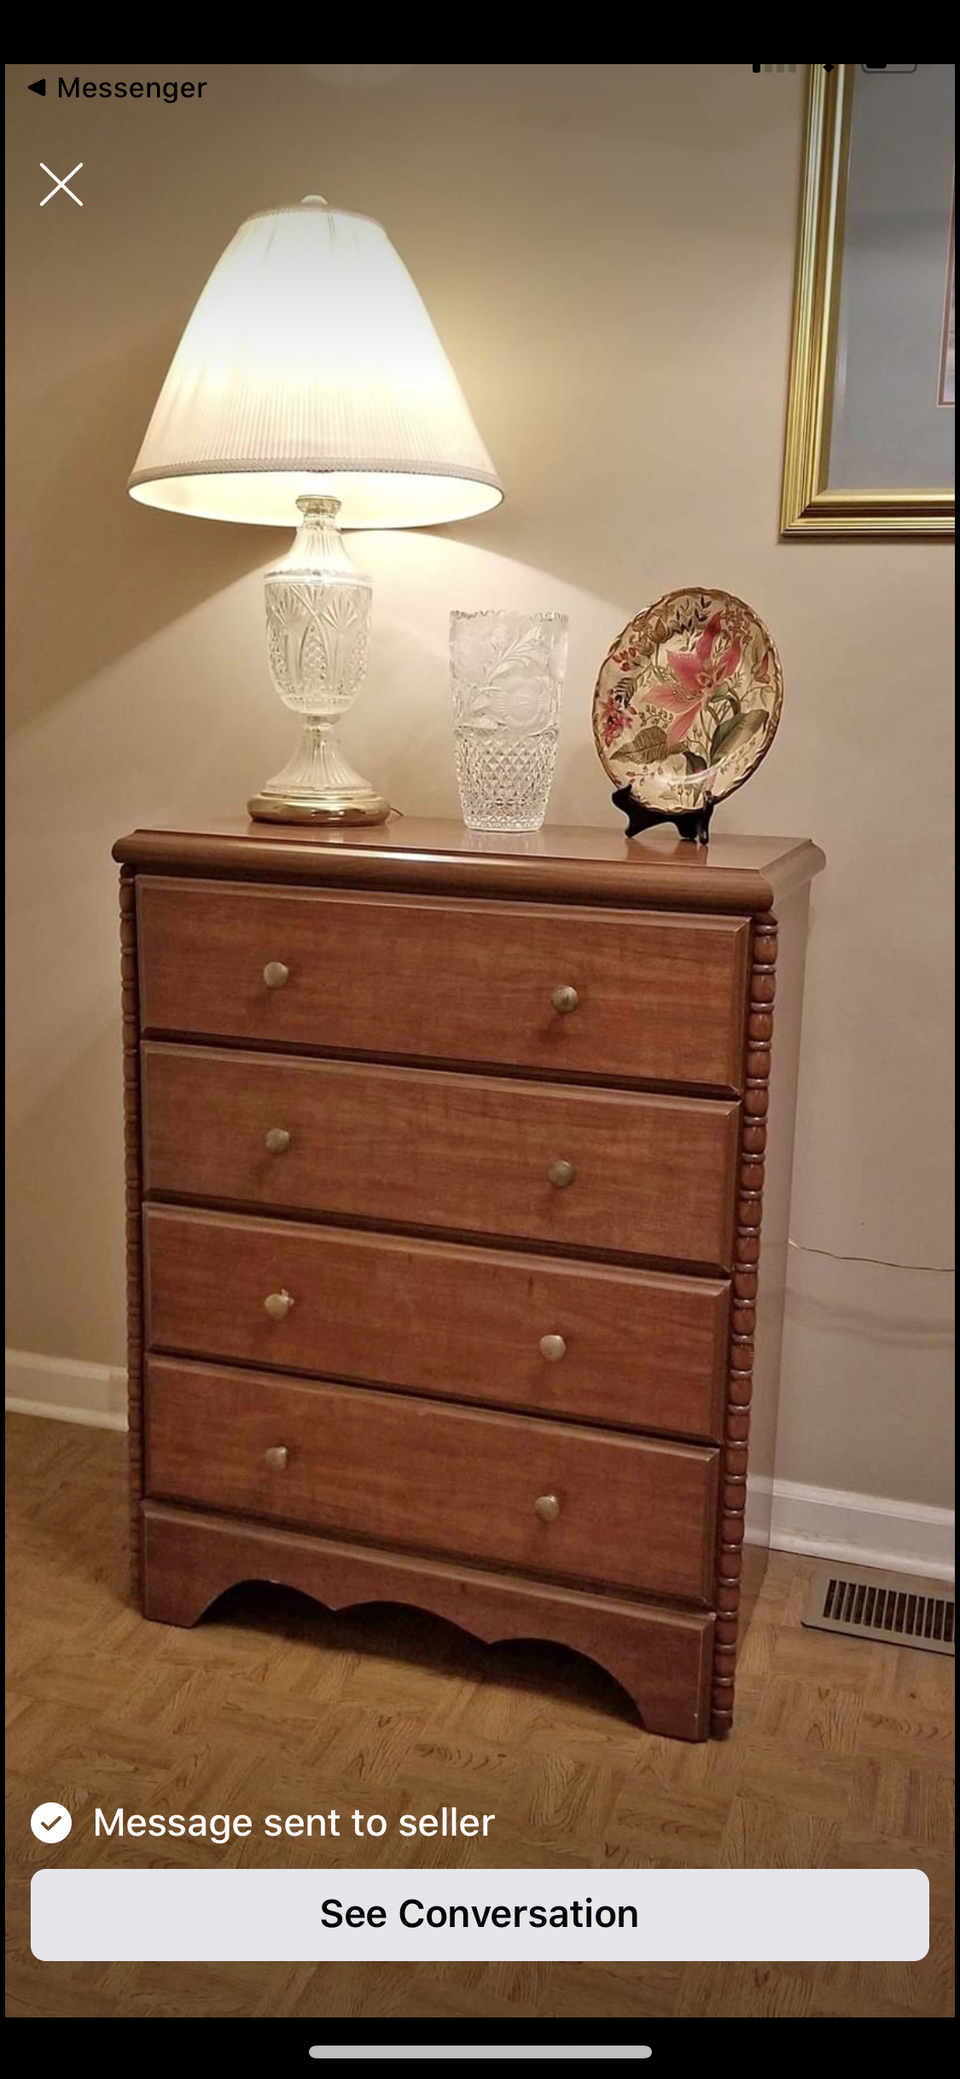
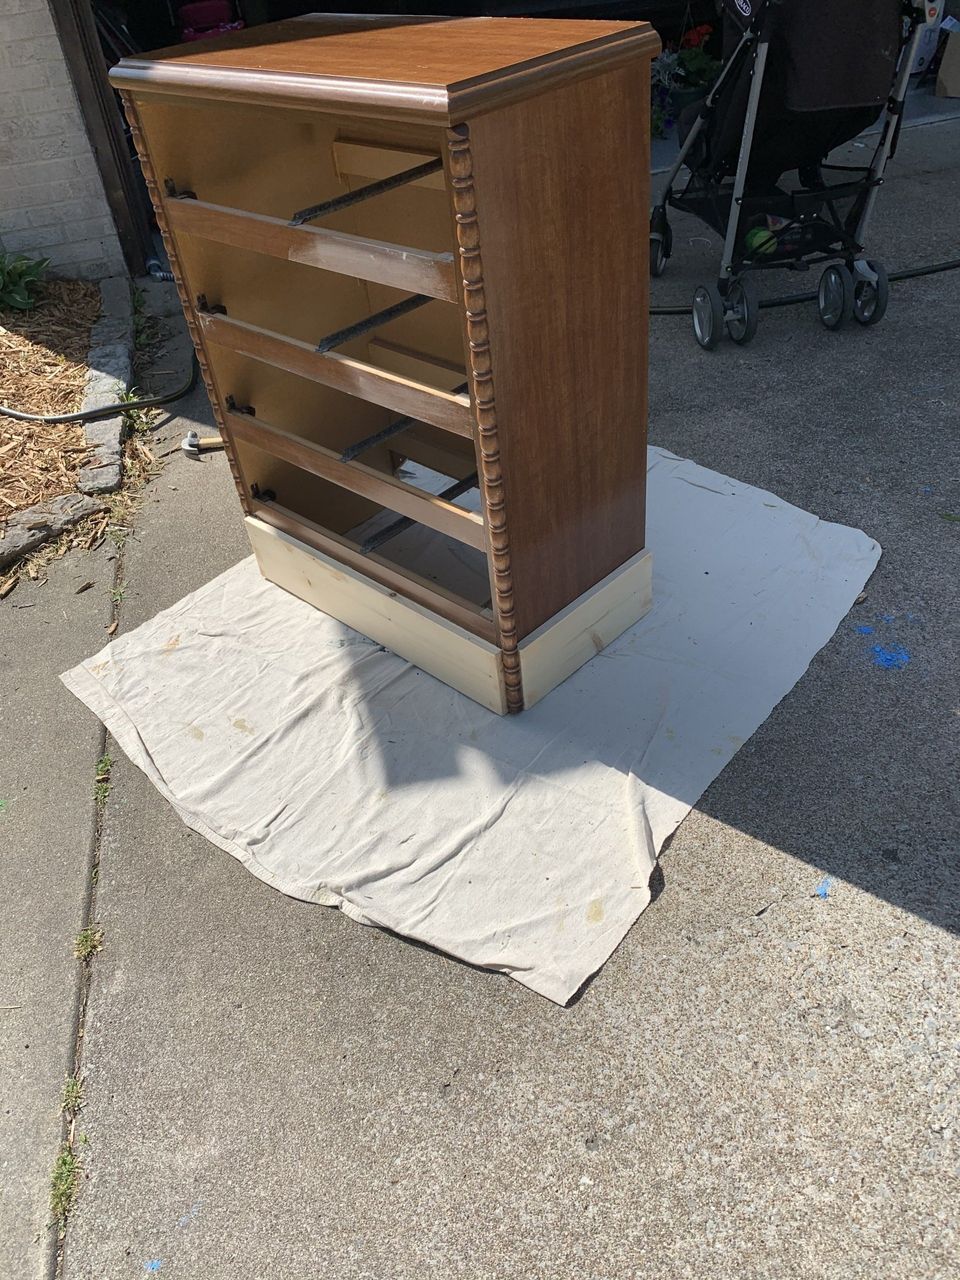
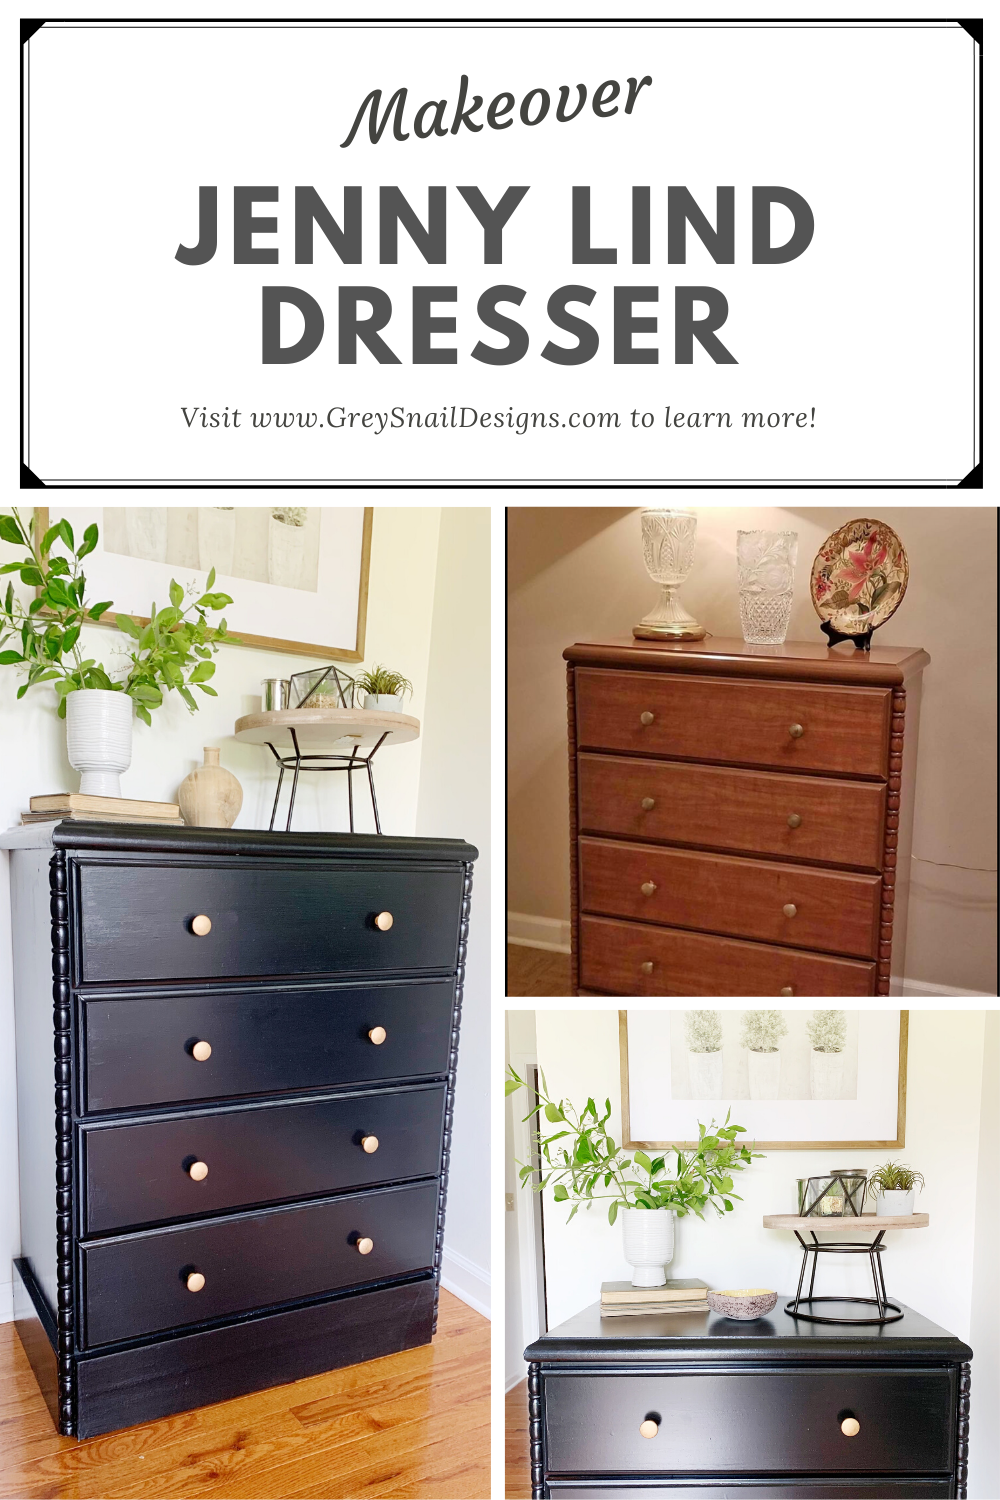
I found this little Jenny Lind style dresser on Facebook Marketplace and I had to have it. I love the look of Jenny Lind and while I would probably ordinarily try to make this work in our daughter's room by painting it white or pastel colors, I decided to do the opposite.
When I'm looking for something to buy, I want to make sure it is in pretty decent condition and that I like the lines of the piece. Some things, even I don't have much vision for, but this classic little dresser pulled on my heartstrings the moment I saw it.
Prepping the Piece
Once I got the piece home, I could see it wasn't solid wood, but wood veneer over mdf, so any chance of sanding and refinishing it was out the window. Luckily, painting it was my real first choice, anyway.
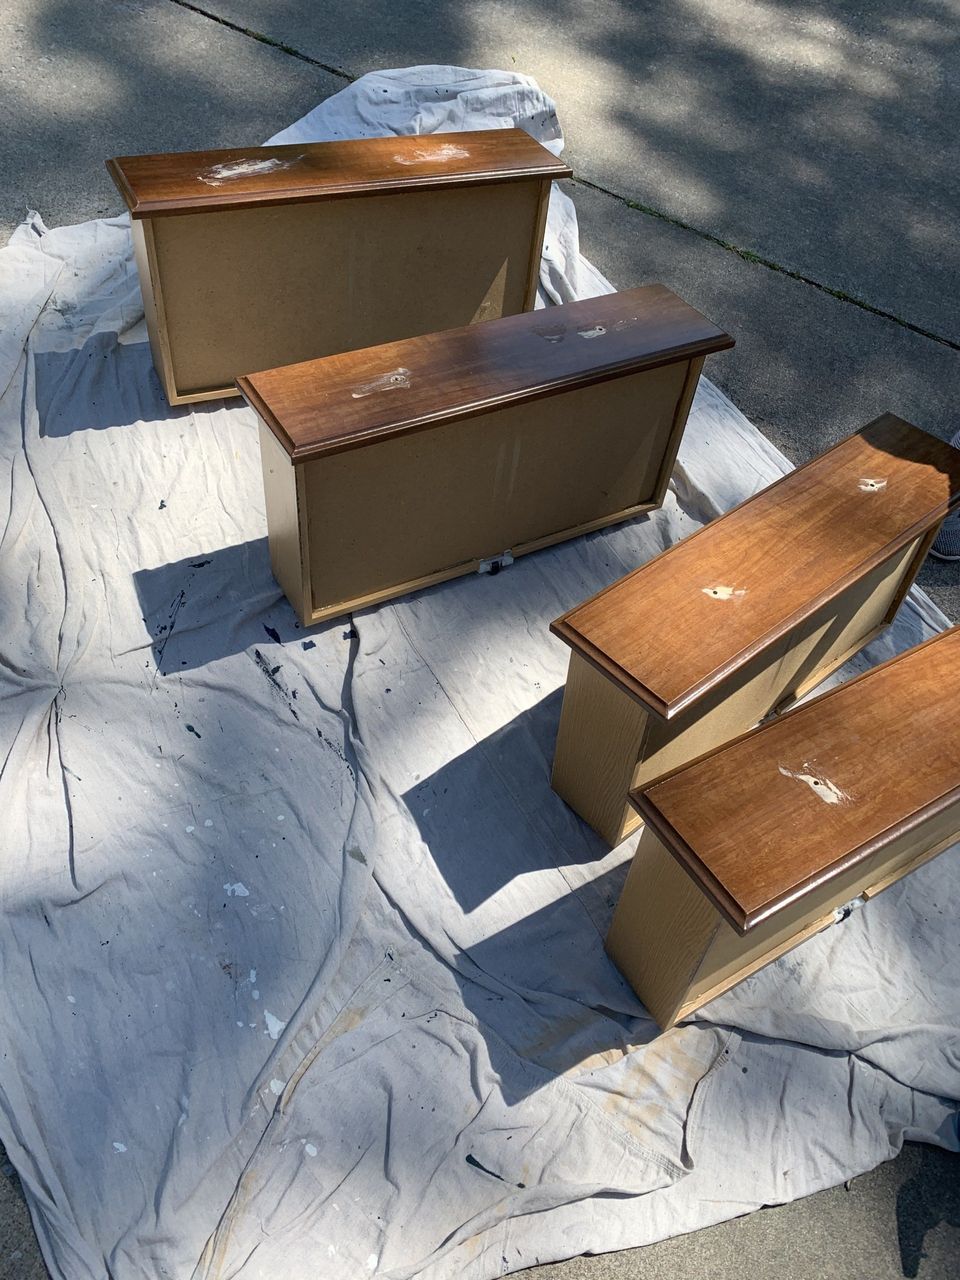
I cleaned the dresser with Windex and a paper towel, inside and out. Then, I applied wood putty with a little trowel on any areas where the veneer exterior was chipped and let it dry. I focused on the areas around the drawer pulls, since there was some wear here.
Removing the 80s Decorative Piece
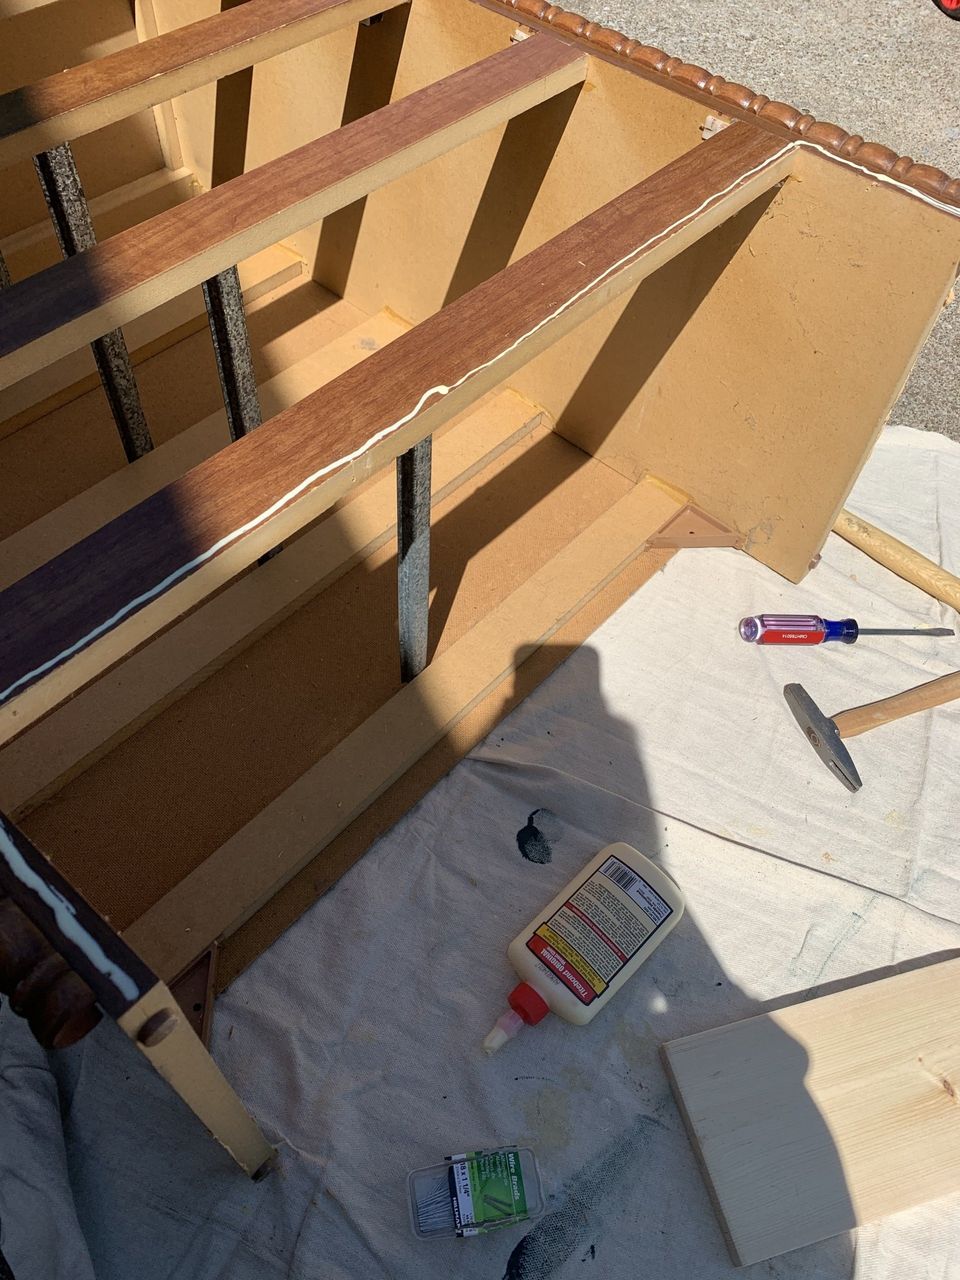
See that little decorative cut-out on the bottom front of the dresser? I don't like that, but guess what? I can fix it! It isn't structural at all; it's purely decorative, so you can easily remove it. I used a flat screwdriver with a hammer, but you can use a pry bar, too. I didn't want to use ours, because the last time I used it, I got poison ivy and I wanted to wash it first. Or, you can have your dad remove it. It looks like he is having a good time. He is here wearing his favorite USTA sweatshirt from 2003. He would probably want me to mention that.
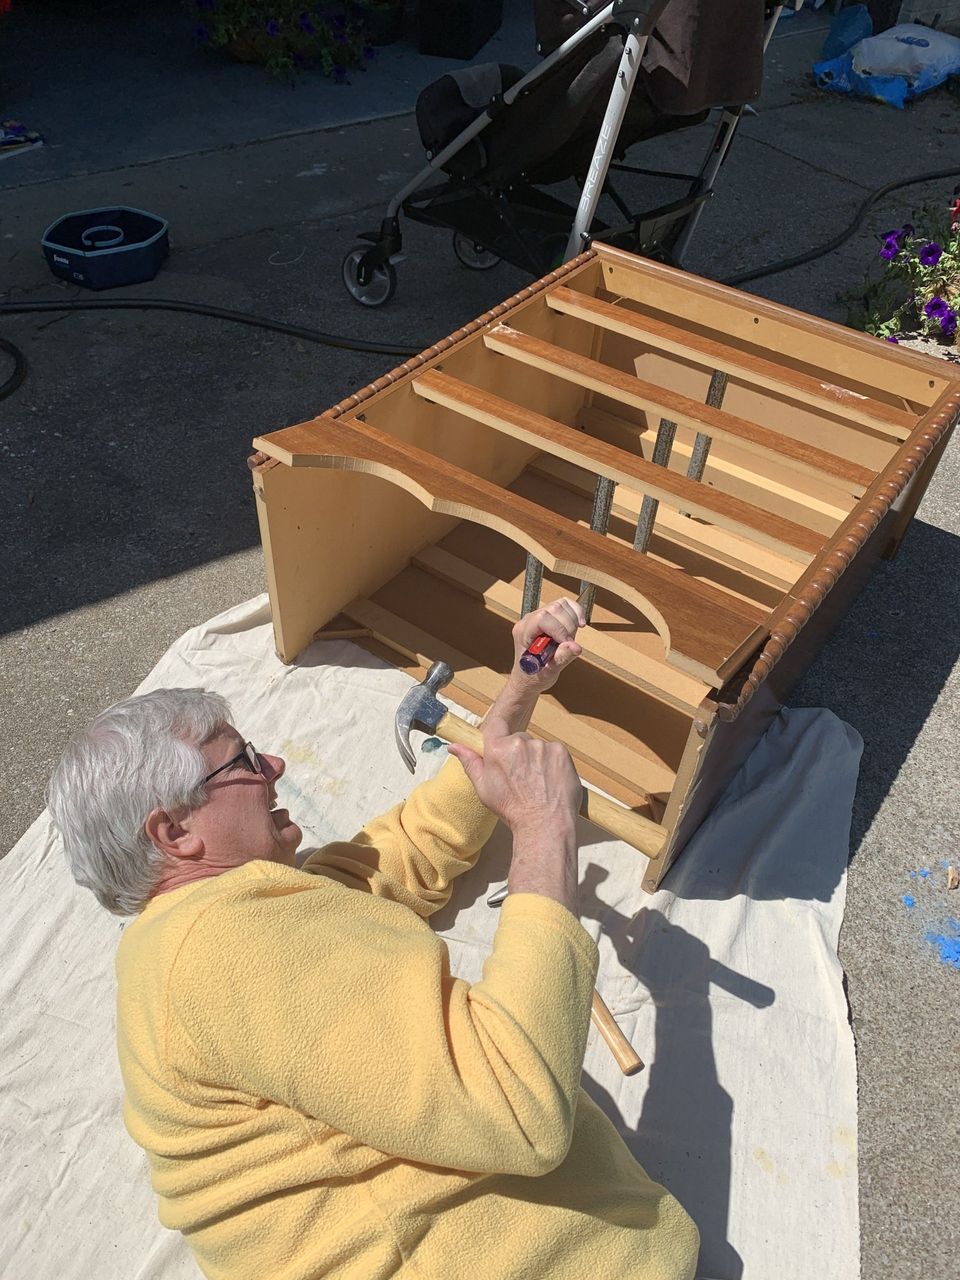
I measured the existing trim piece, which was 6" wide, so I used a 1x6x6 board to cut a replacement piece. I cut a board to size with my trusty Craftsman hand saw and used wood glue and finishing nails to hold it in place. I ended up doing the same 1x6 boards on the sides, too. I just put on the wood glue and used 2" finishing nails to hold it on. After it was nailed in, I filled all the nail holes with wood putty. Oh, and I sanded all three boards and edges really well.
Painting
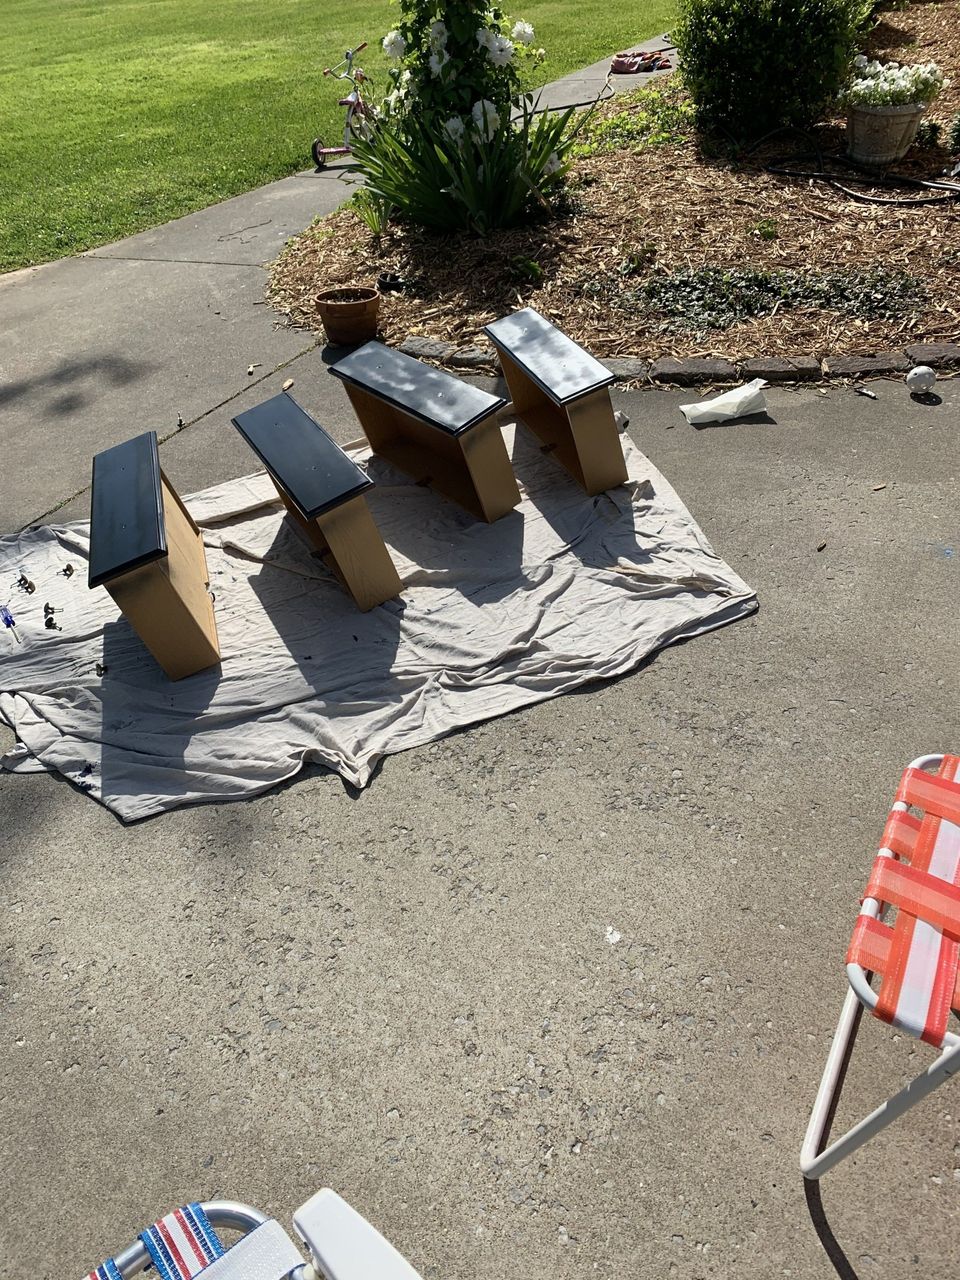
I used a can of black spray paint by Krylon that was recommended for plastic, metal, wood, etc., and sprayed a light coat on the dresser and drawers. I ended up putting 3-4 coats on total, but the key is light coats. Oh, and a dry, sunny day. Never try to paint when it's wet out.
Varnish
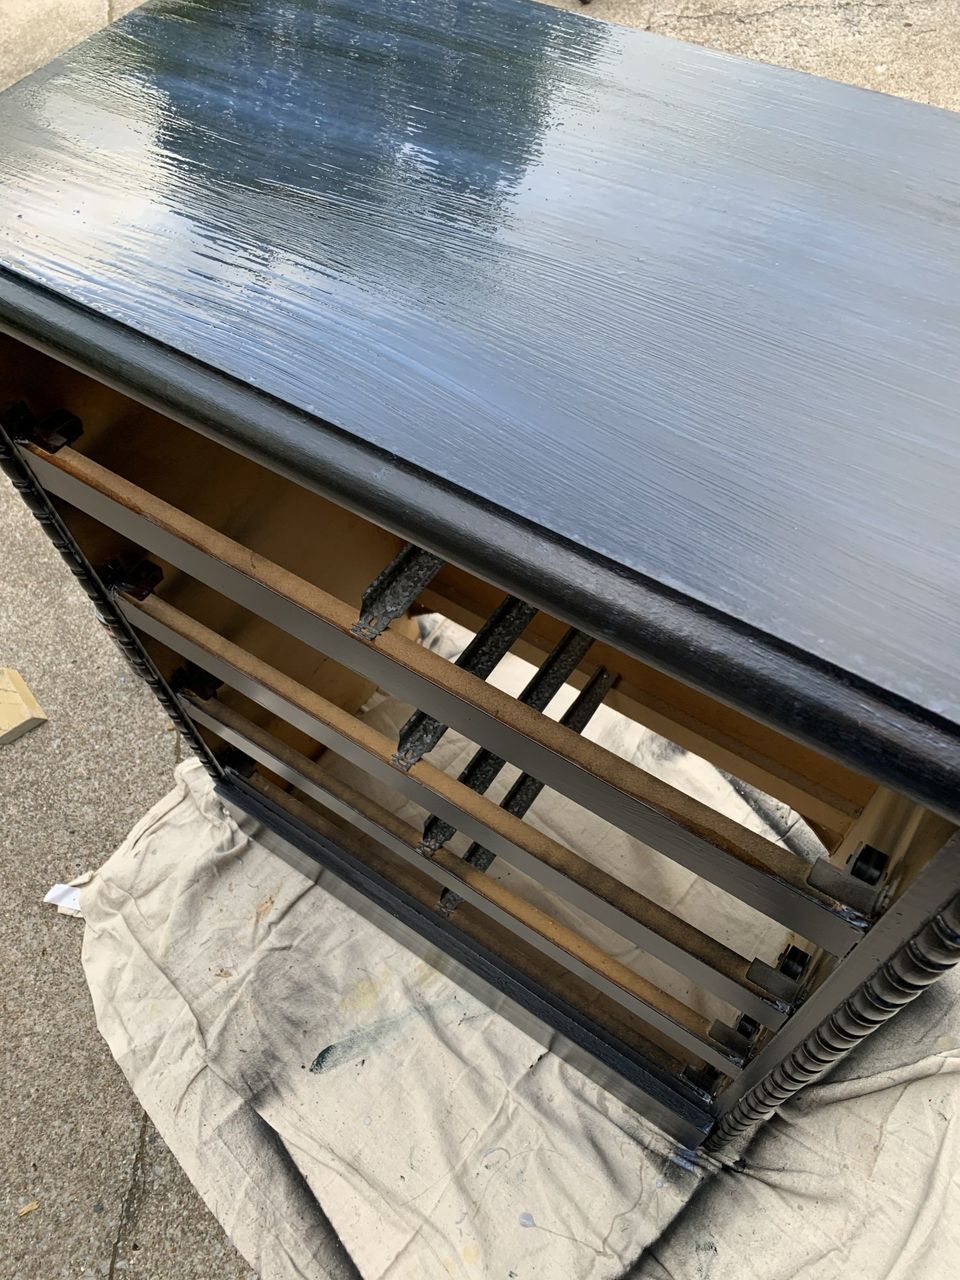
Once the paint was nice and dry, I used a can of water-based Polyurethane to varnish the piece. I applied it in long, smooth strokes with a 2" nylon brush. I but on 2-3 coats and it's super smooth and has a beautiful satin sheen.
Hardware
I didn't mind the shape of the existing hardware--it was just small round knobs, but they weren't in great condition. So, smeared Rubb'n'Buff in Antique gold all over them and let them dry before reattaching. It makes things the most beautiful gold. I like to wear gloves to do it, so I don't have to scrub my hands so much after using it.
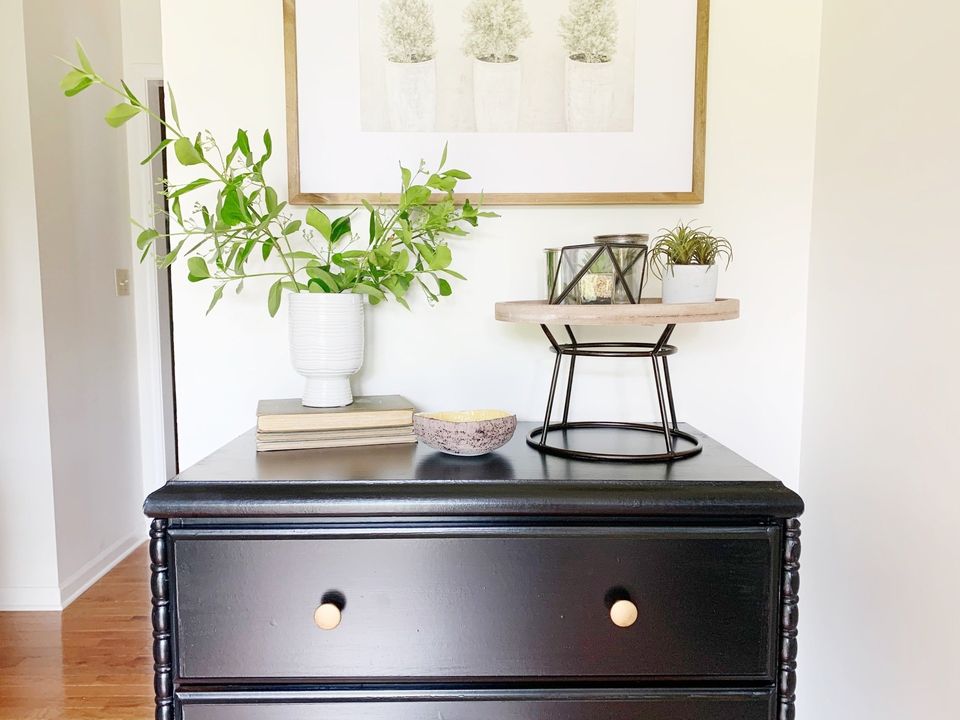
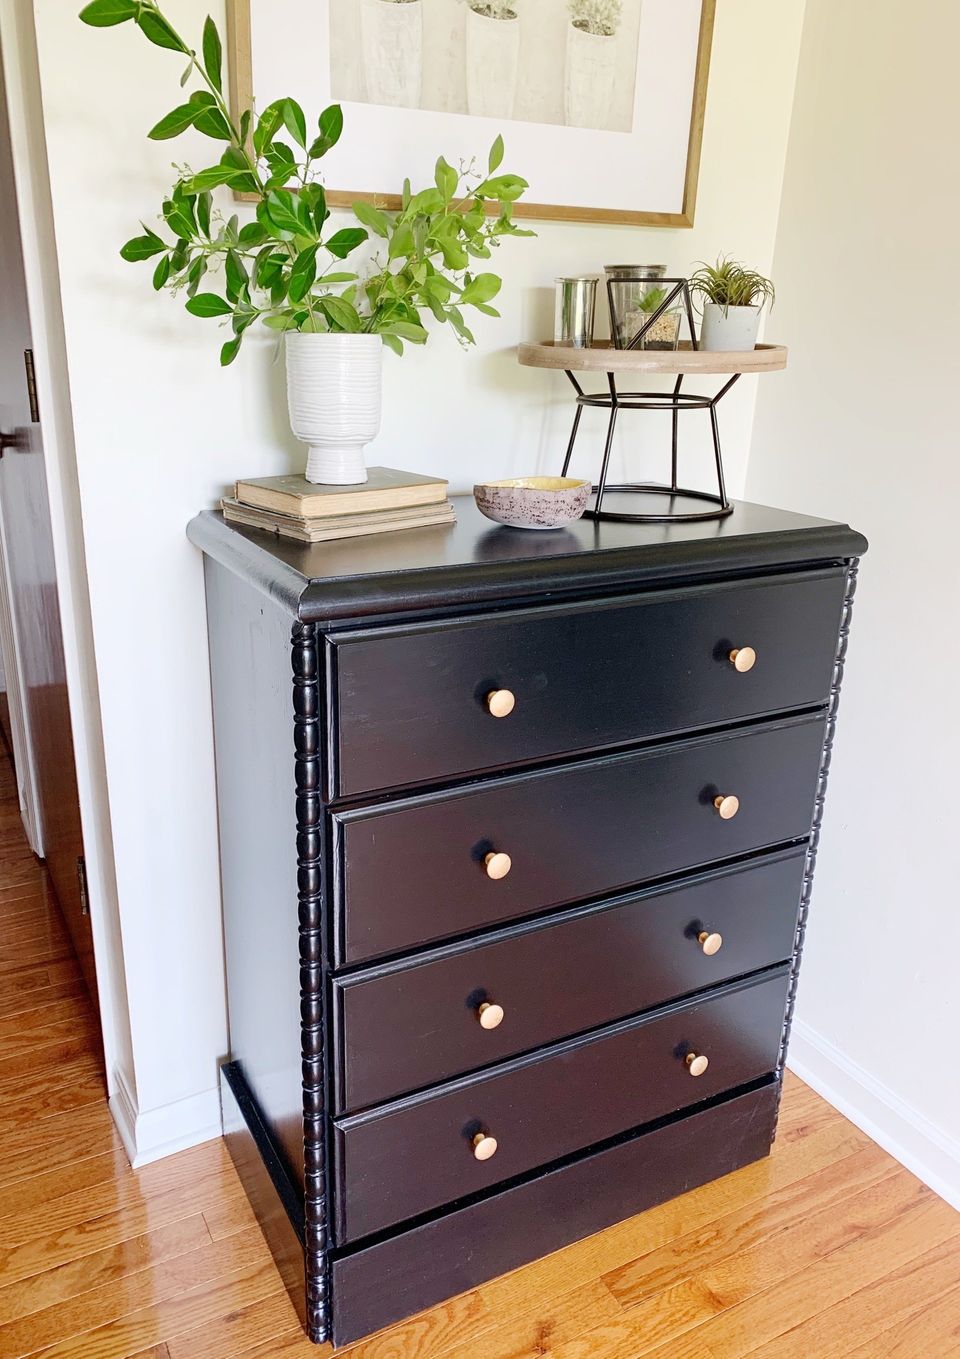
This was my first experience removing and replacing trim from furniture and it totally blew my mind! You can't believe the furniture I've turned up my nose at because it had some small detail I didn't like. Now I know some of these things can be easily changed to fit your style! I absolutely love how this little dresser turned out. I keep moving it around our house to see where I like it best, but you just can't beat it against this white wall. I hope you'll tackle a piece and make it your own!
If you liked this furnit

Save for Later!

Rifle Paper Co Wallpaper

Space Planning

Rifle Paper Co Wallpaper

Designer Drapes

Rug Roundup January 2024

Booth at Christmas Market
Grasscloth

What not to do

Romabio Velatura Mineralwash

I can't remember the first example of fluted wood furniture I saw, but it was probably either this gorgeous custom wood bathroom vanity from Chris Loves Julia , or the DIY fluted coffee table Fariha shared on Pennies for a Fortune . The custom cabinetry was done professionally using a router for each line, which isn't something I possess the skills to do. This did help inspire the colors I used in our bathroom remodel, though! I really connected to the method Fariha used to build the coffee table--wooden dowels. What a fabulous idea!