
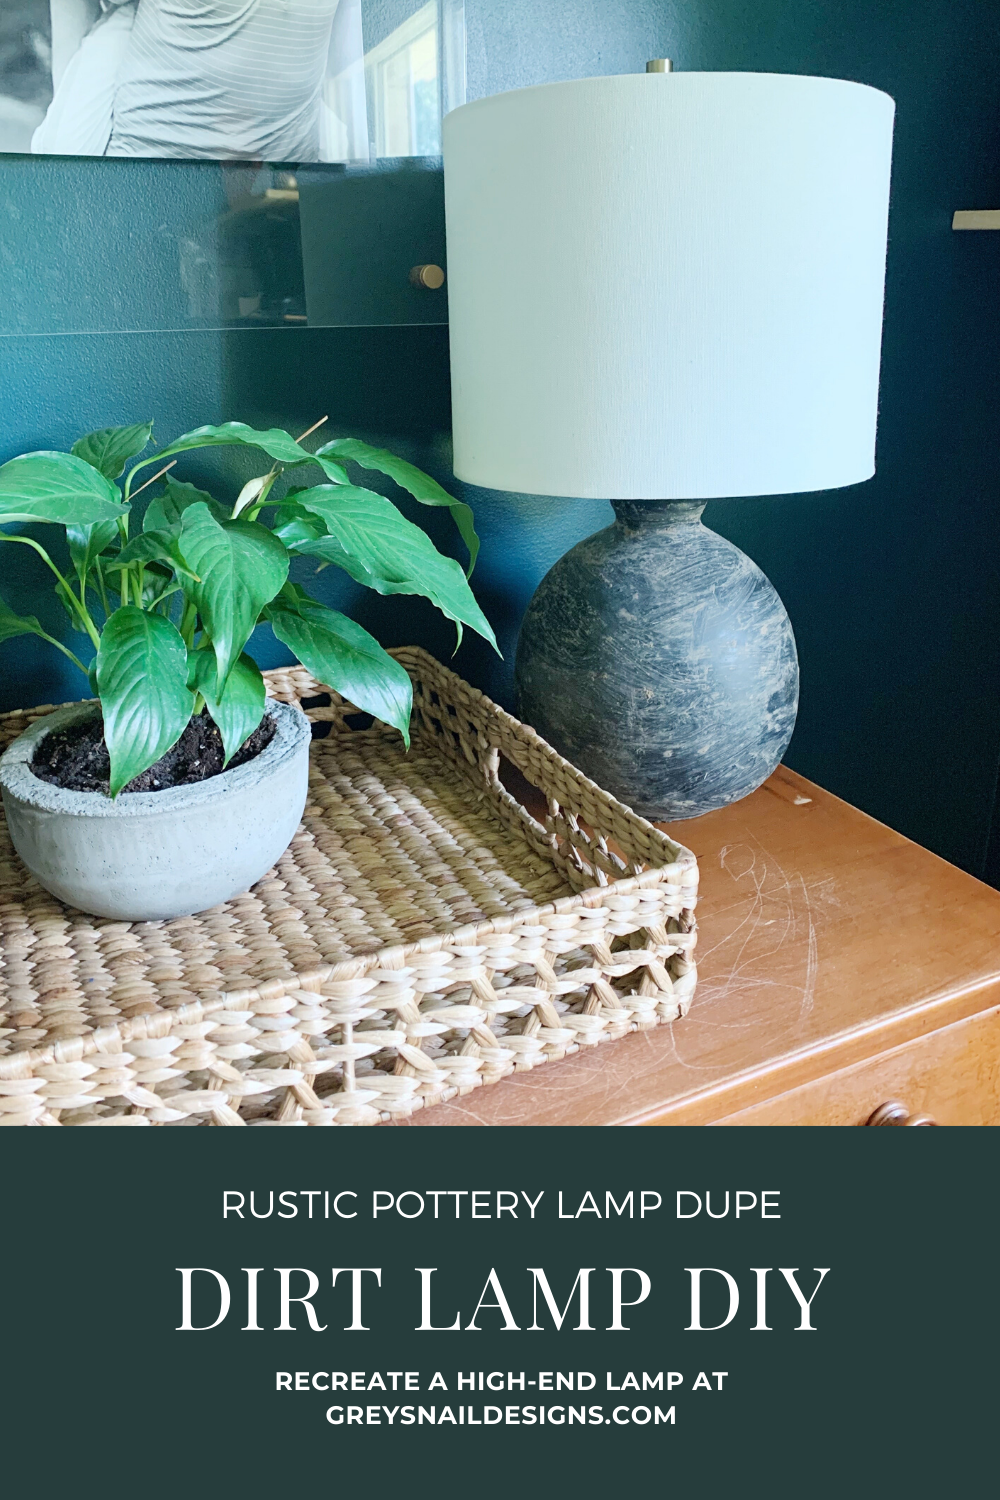
Dirt Lamp DIY
July 3, 2020
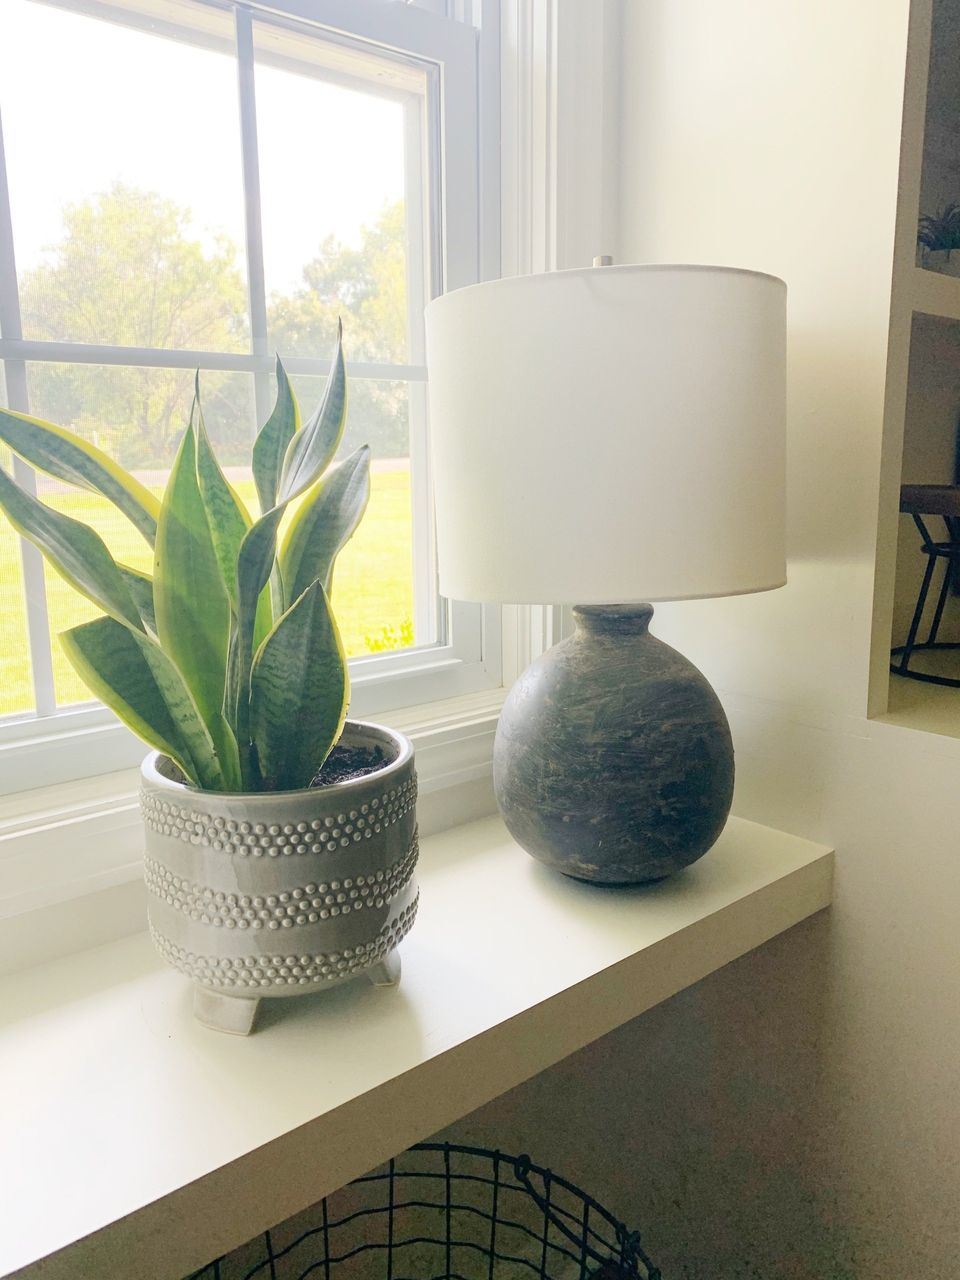
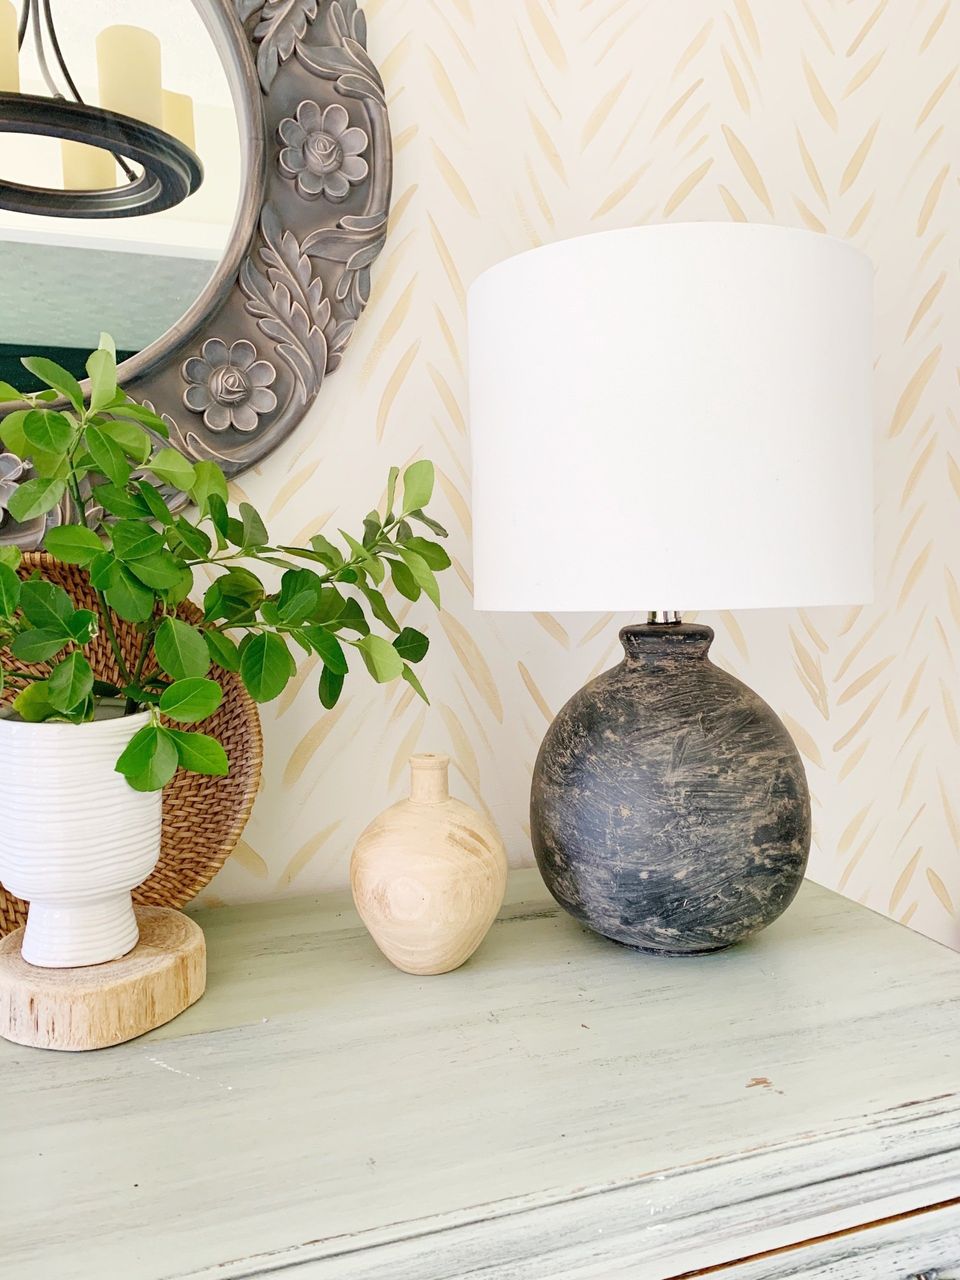
Rustic Lamp Makeover
I've seen this technique used on ceramic vases, crocks and lamps, and I've been itching to try it out myself. The basic idea is to spray paint your vessel with a matte (black) spray paint, let it dry, smear wet dirt/mud all over it and buff off the excess. The result is something from a high-end catalog or store. If you try to buy a lamp like this
online, you'll see price tags well over $200, so with a few supplies, you can recreate the look for much less.
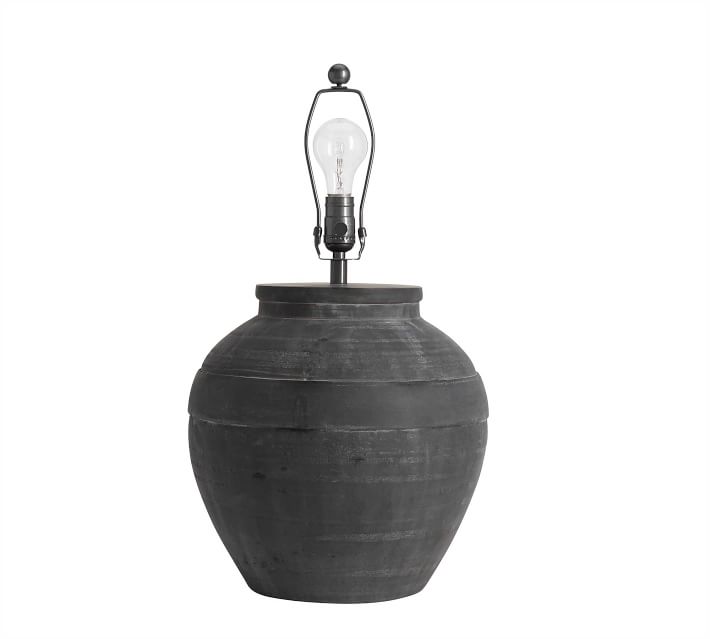
Choosing your Vessel
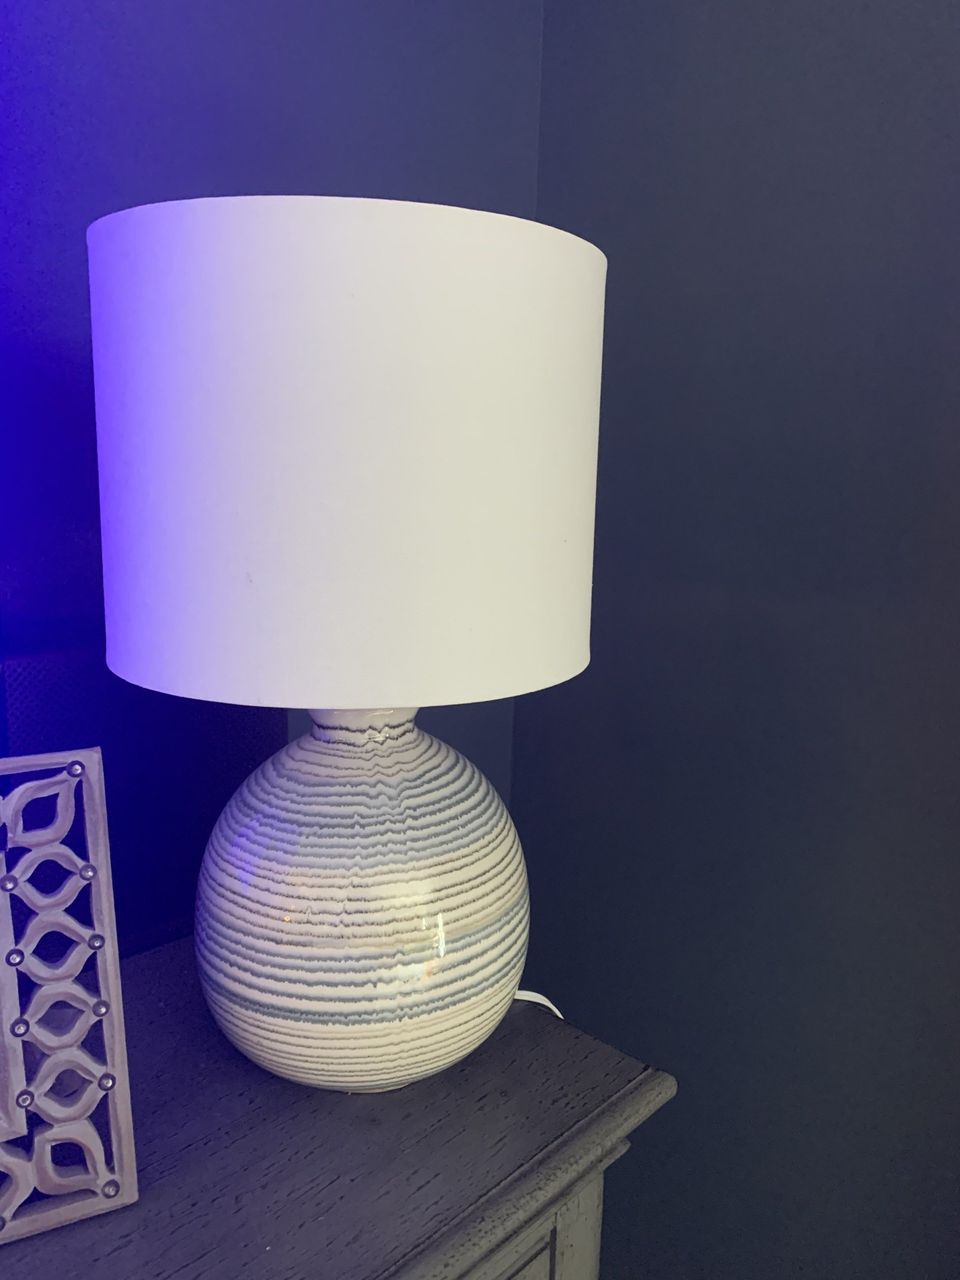
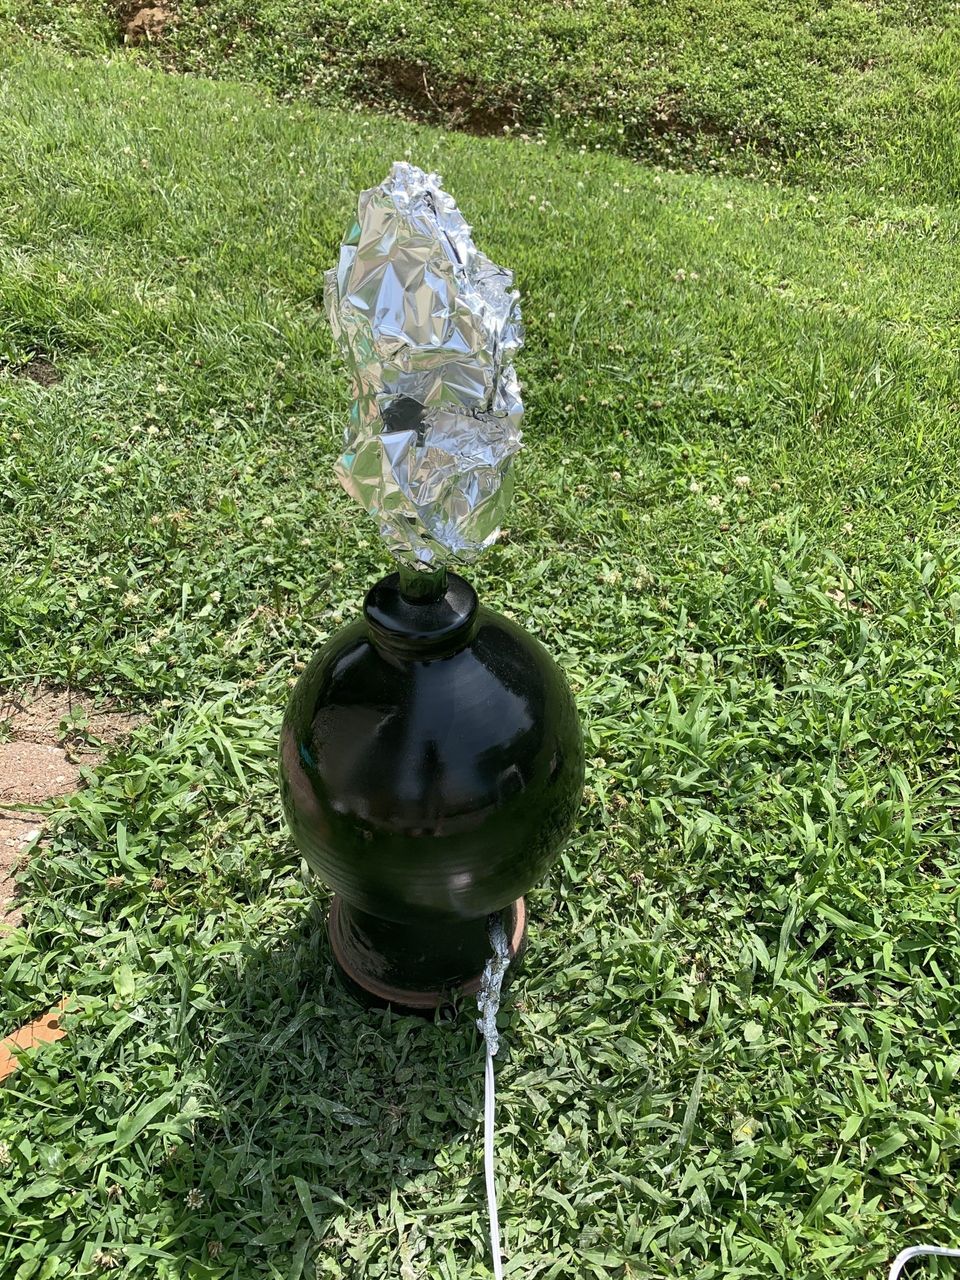
The key to choosing the right piece for this project is to select a substantial and chunky vessel. You can use a vase or a lamp, but it shouldn't be super delicate or spindly. You want it to look like a heavy piece of artisinal pottery. I chose a lamp I got several years ago from TJ Maxx. It's a medium-sized lamp, but it's ceramic base was the perfect shape. I'd love to get a tapered shade for it, but this drum style still looks nice.
Prep Work
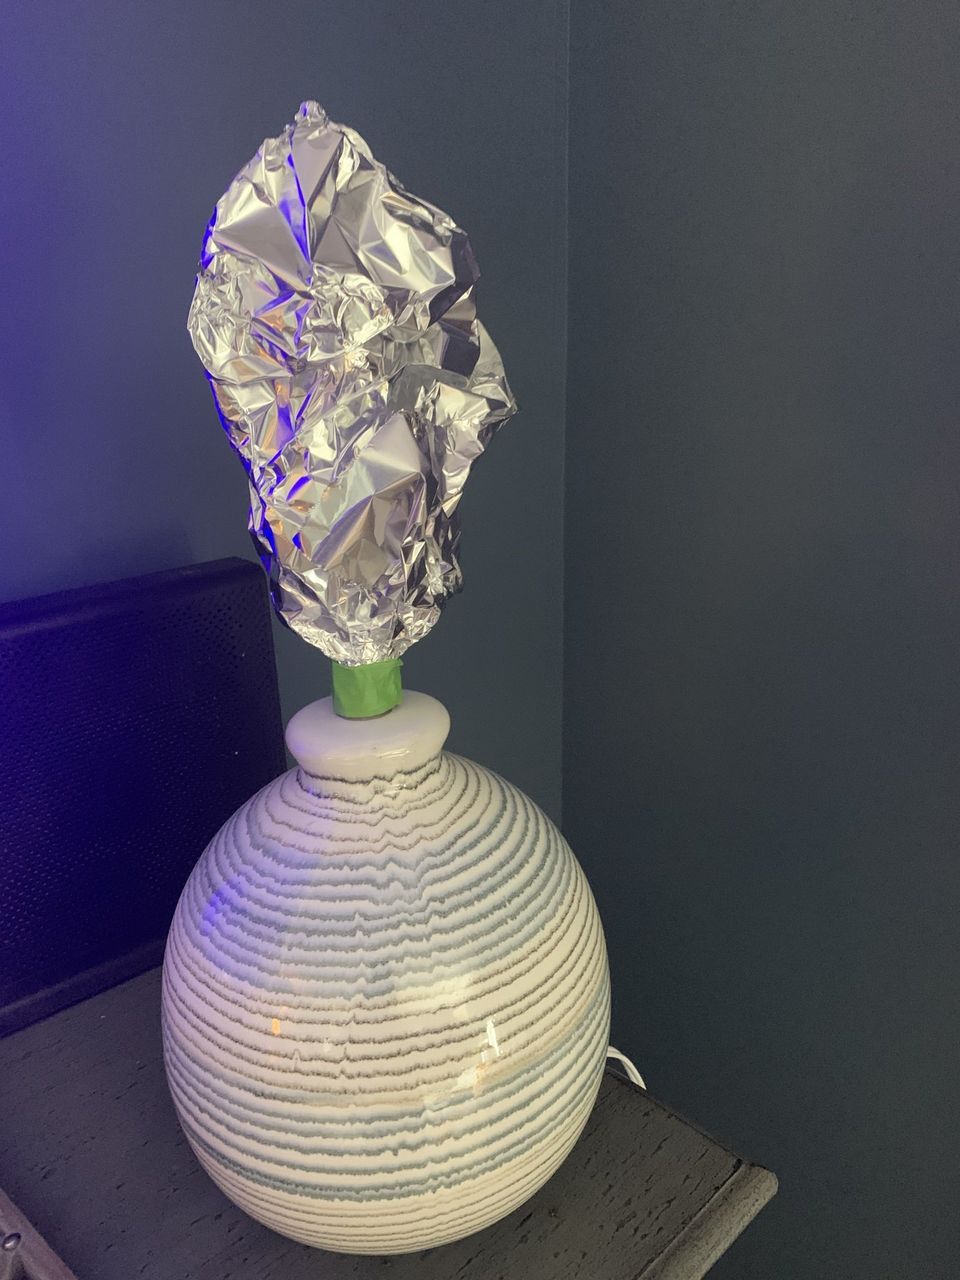
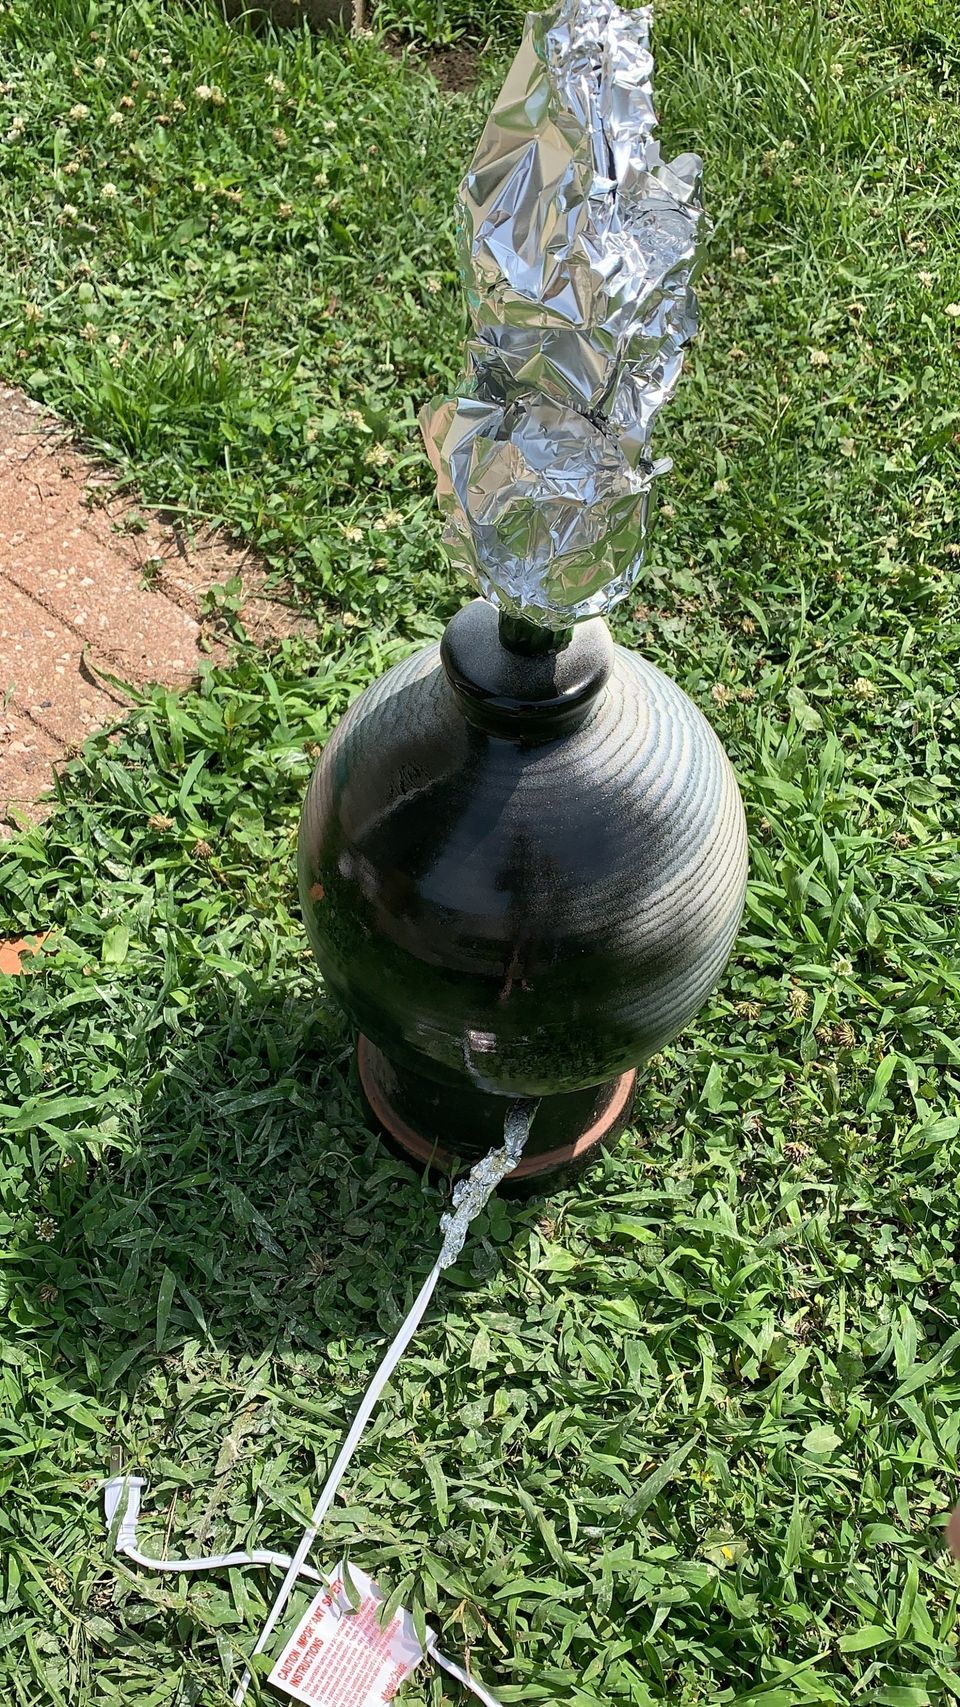
My mom recently told me about this technique of masking areas you don't want to paint using aluminum foil. You simply wrap any area you don't want paint on with foil and it works perfectly. It's great for projects that have larger areas to mask, or awkward shapes that don't lend themselves to tape. I wrapped the harp and base of the cord with foil and started spraying.
Spray Paint
I used Krylon Fusion All-In-One Paint + Primer
in Matte Black for this project. You can get it at Lowe's. It has great control and it only took one coat for this project! Remember, the most important thing to remember when using spray paint is to make light coats. Otherwise, you'll have drips and thick areas. You really need to select a matte or flat sheen for this project. I use satin and high-gloss finishes for other things, but since you're imitating pottery, the matte finish is super important to its authenticity.
You'll want to get down low and look at your piece from another angle to be sure you have everything covered. There's almost always a spot you've missed. I let the paint dry completely before adding the dirt in the next step. It was approximately 139-degrees outside, so this took, like, 5 minutes and I had sweat all the way through my clothes.
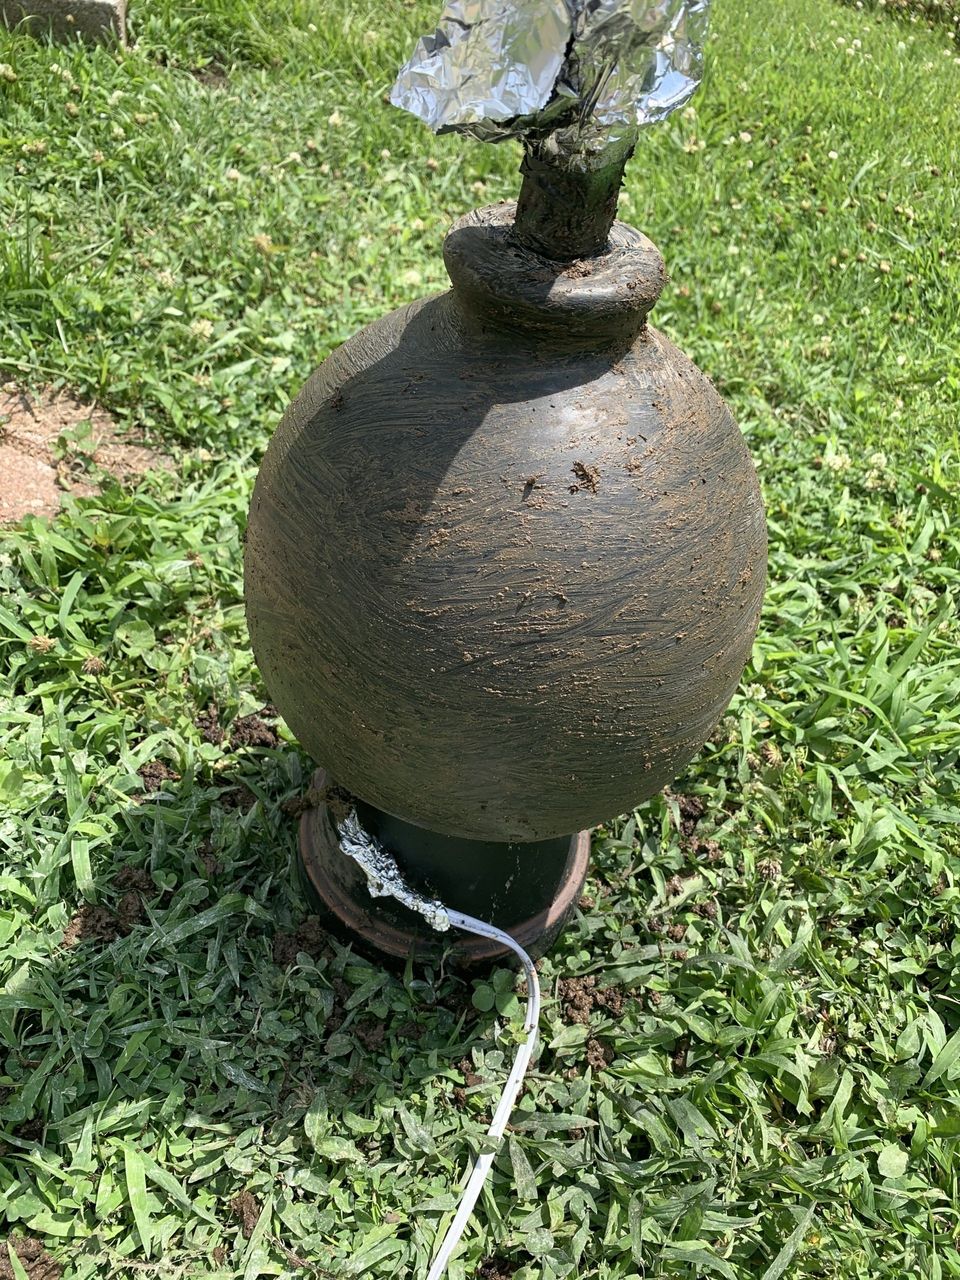
Adding Wet Dirt aka Mud
I hesitate to say you need mud for this, because you really just need wet dirt--nothing too slimy. Our dirt here is extremely clay, so I mixed some dirt from my yard with some potting soil, added a little water and mixed it up. I ended up adding more dirt because I got too much water, so just picture damp dirt. It can still be a little powdery.
You can wear gloves for this, or not. You just take the wet dirt and smear it around the piece with your hand. I went with the shape of the lamp, smearing it back and forth in a horizontal motion (not up and down). I imagine you could swirl it a little bit, but you're mainly going to be applying it like you're polishing something.
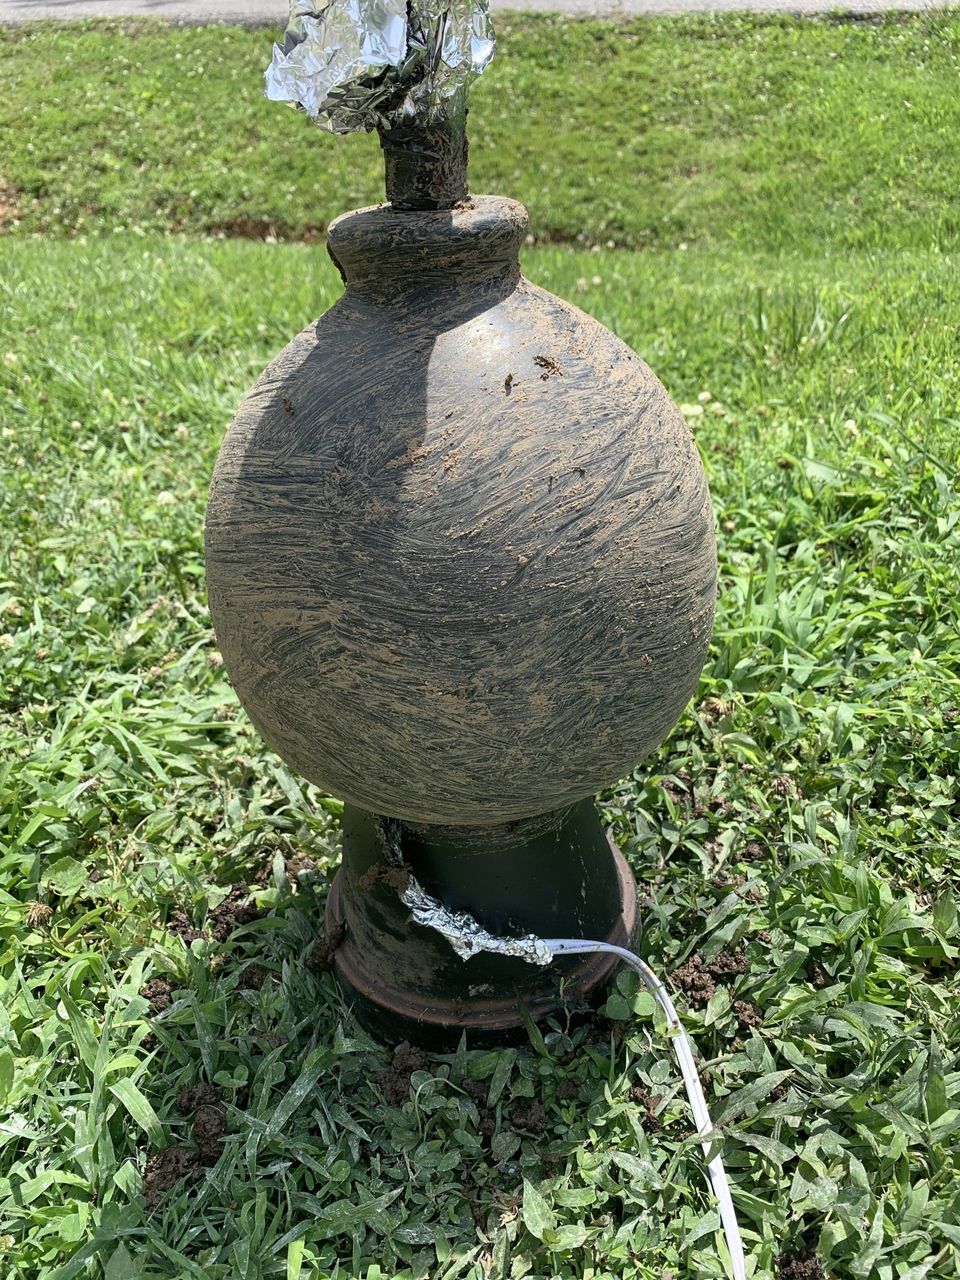
Once it's dry, you can gently buff off the excess with a paper towel or dry cloth. Work until it is pretty smooth and it will be perfect, but be careful not to be too heavy handed and scrape off everything. Gentle is key.
If you do buff off too much, give that area a small spray of paint, let it dry and carefully apply some more dirt and repeat the gentle buffing process.
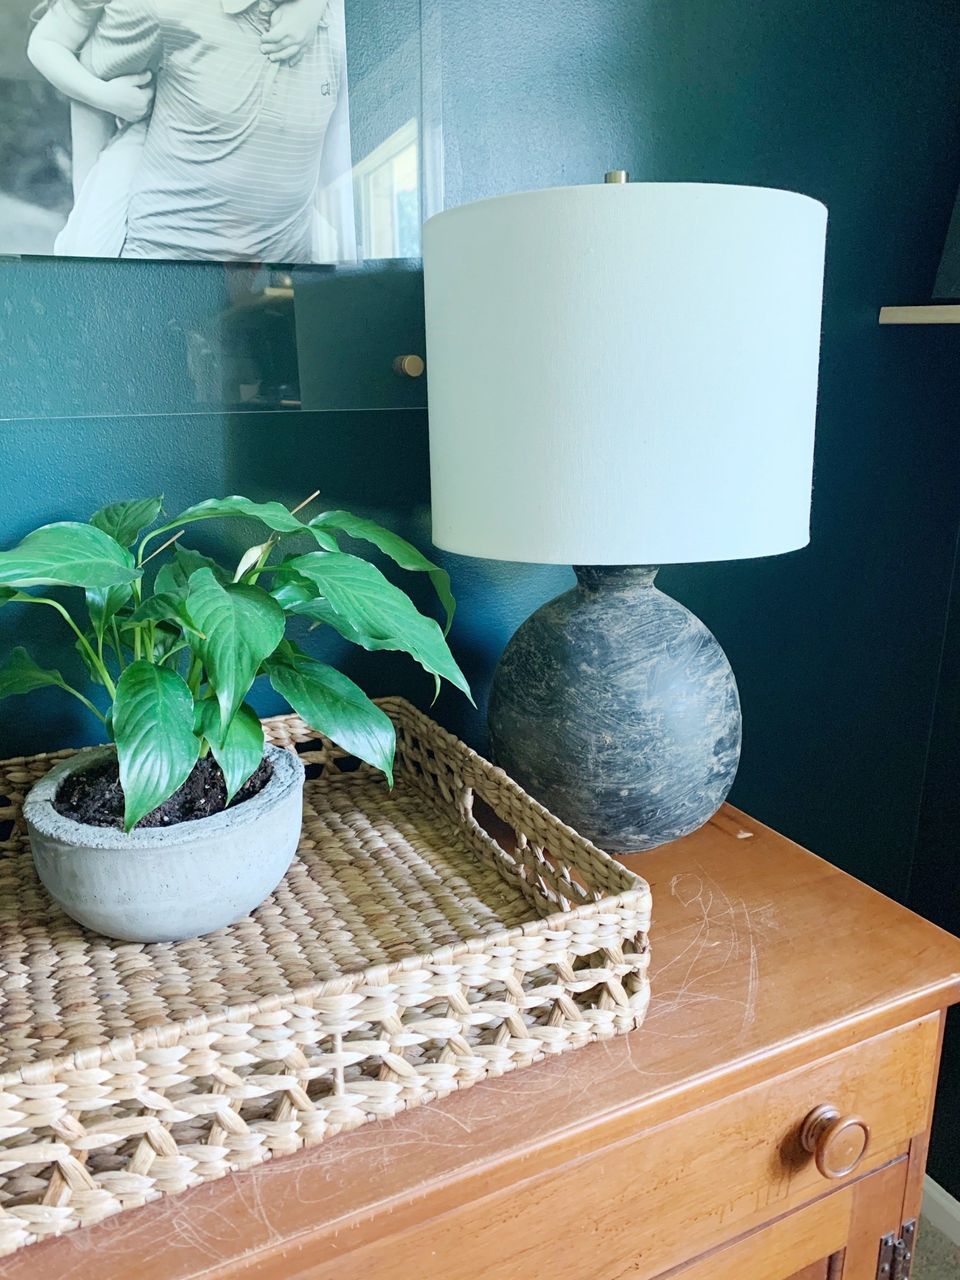
All Finished
Put your lampshade back on and you're all finished! This is a really easy and inexpensive project and great dupe for an expensive lamp. I can't wait to try this process out on some vases!
Pin for Later!

Rifle Paper Co Wallpaper

Space Planning

Rifle Paper Co Wallpaper

Designer Drapes

Rug Roundup January 2024

Booth at Christmas Market
Grasscloth

What not to do

Romabio Velatura Mineralwash

I can't remember the first example of fluted wood furniture I saw, but it was probably either this gorgeous custom wood bathroom vanity from Chris Loves Julia , or the DIY fluted coffee table Fariha shared on Pennies for a Fortune . The custom cabinetry was done professionally using a router for each line, which isn't something I possess the skills to do. This did help inspire the colors I used in our bathroom remodel, though! I really connected to the method Fariha used to build the coffee table--wooden dowels. What a fabulous idea!